Course tour
Hole #1
- Par 5
- Men's Handicap: 5
- Women's Handicap: 5
- 565
- 535
- 498
- 413
Hole Description
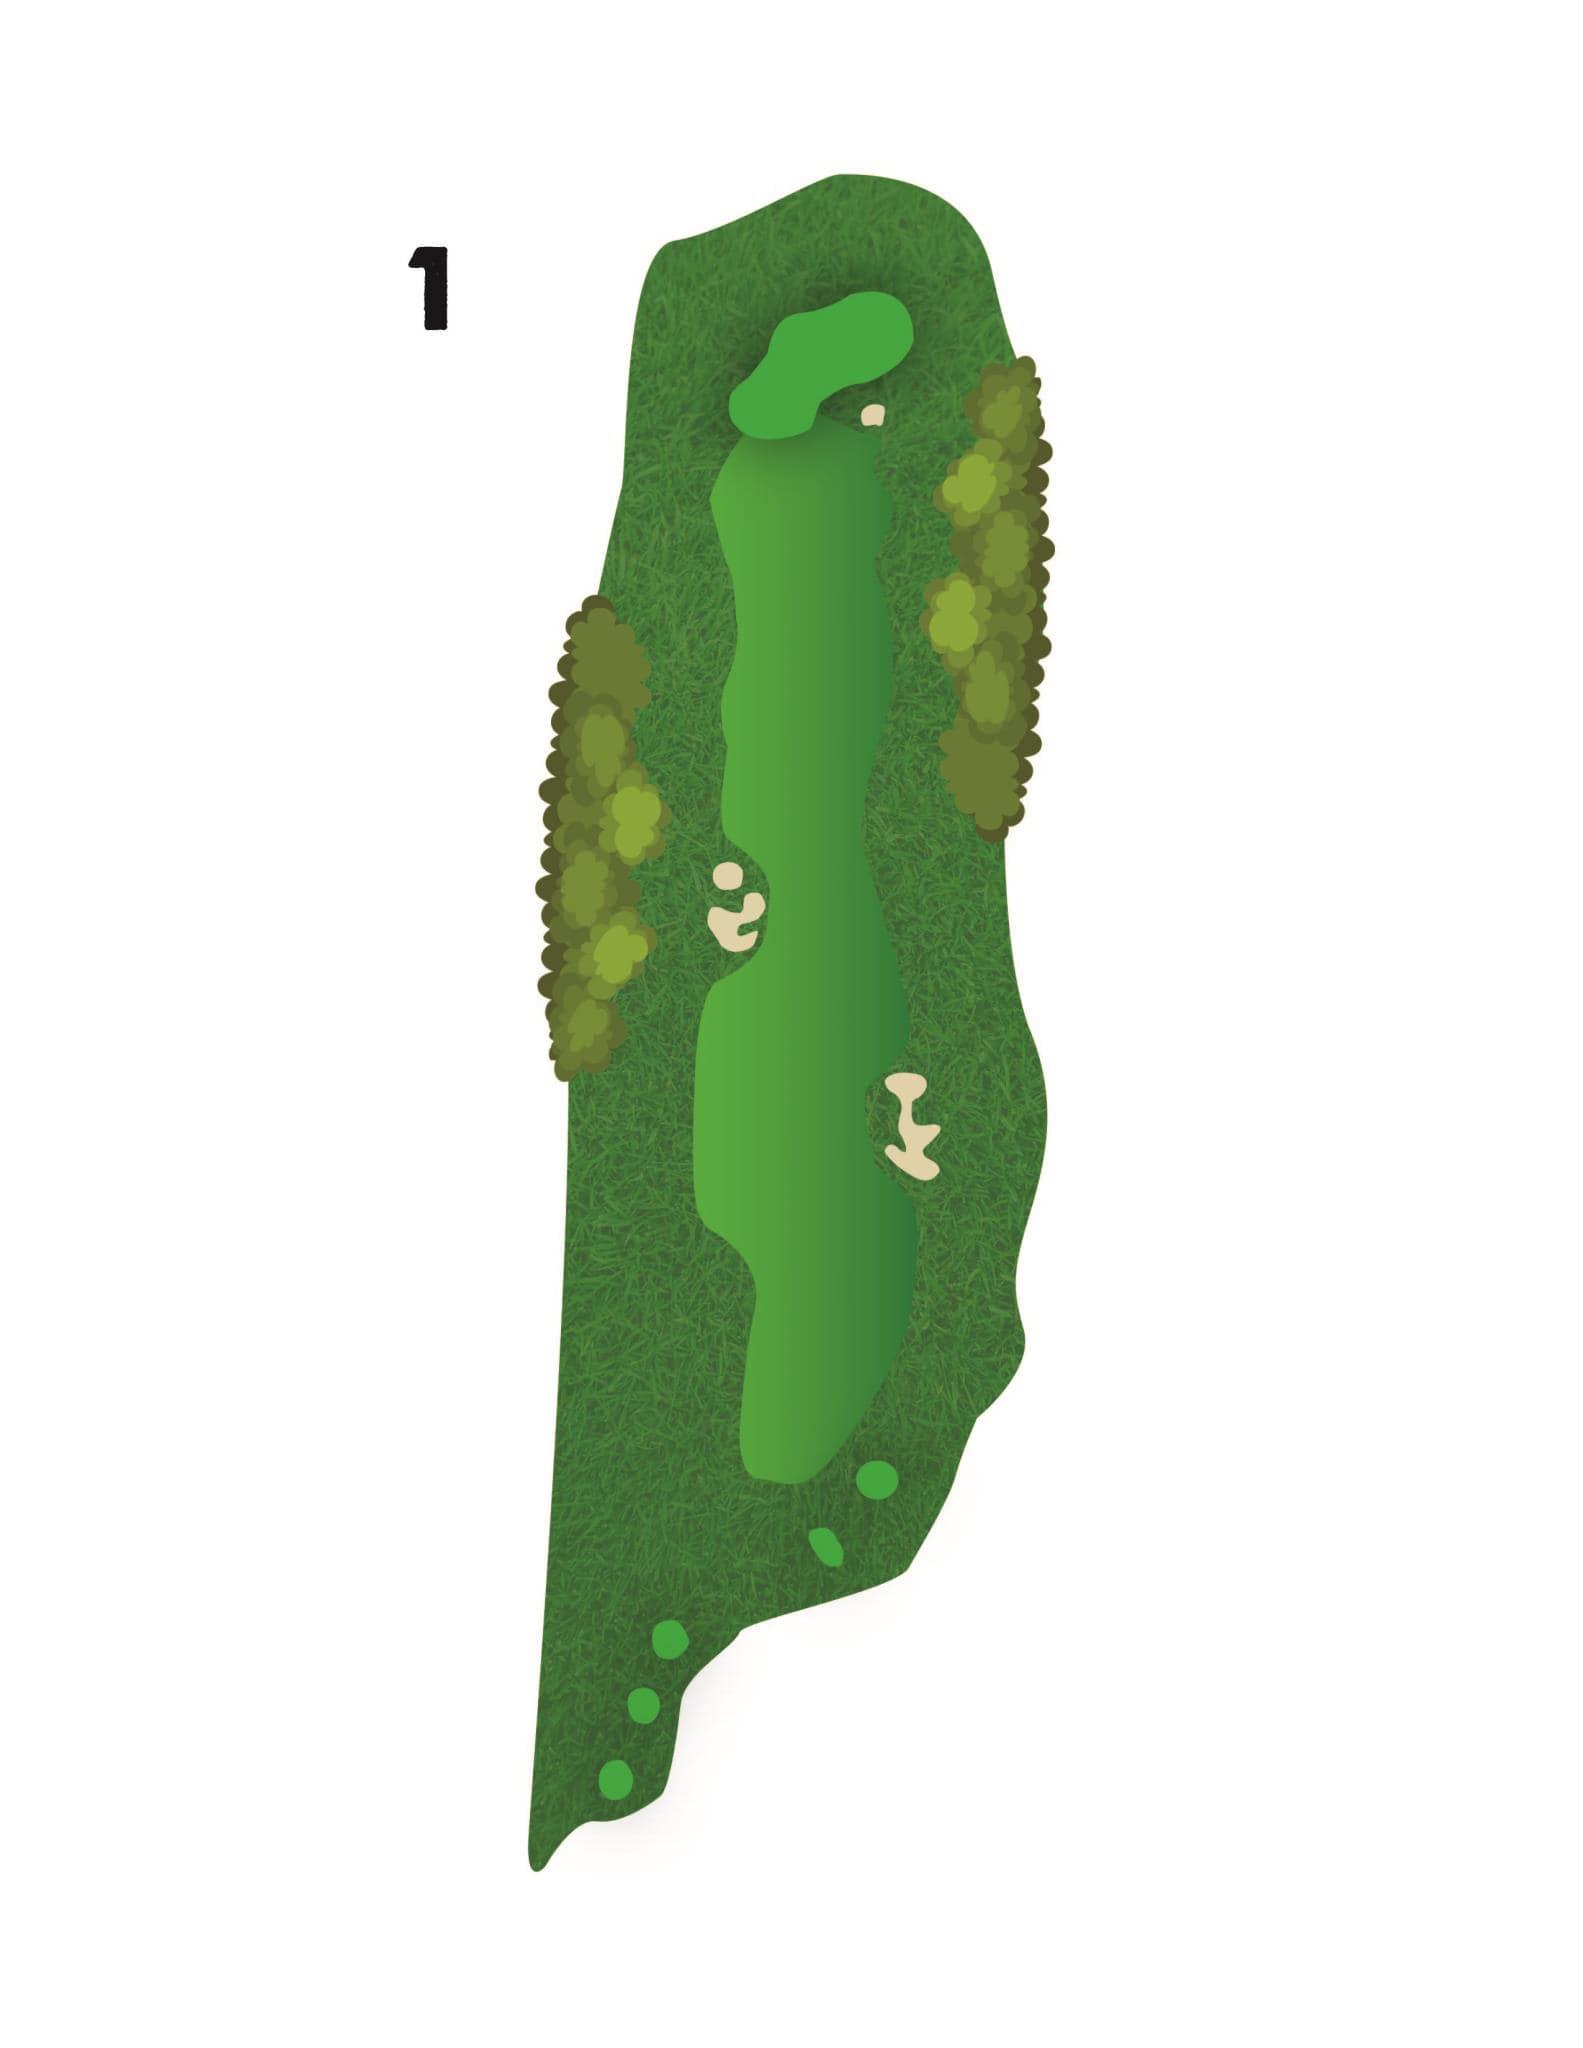
The 1st hole is a straightaway par 5 with a penalty area lining the entire left side of the hole. The landing area is generous off the tee, then the hole narrows considerably as you approach the green. A 3-shot hole for most while longer hitters can take their chances trying to reach the green in two.
Hole #2
- Par 3
- Men's Handicap: 17
- Women's Handicap: 17
- 138
- 123
- 107
- 87
Hole Description
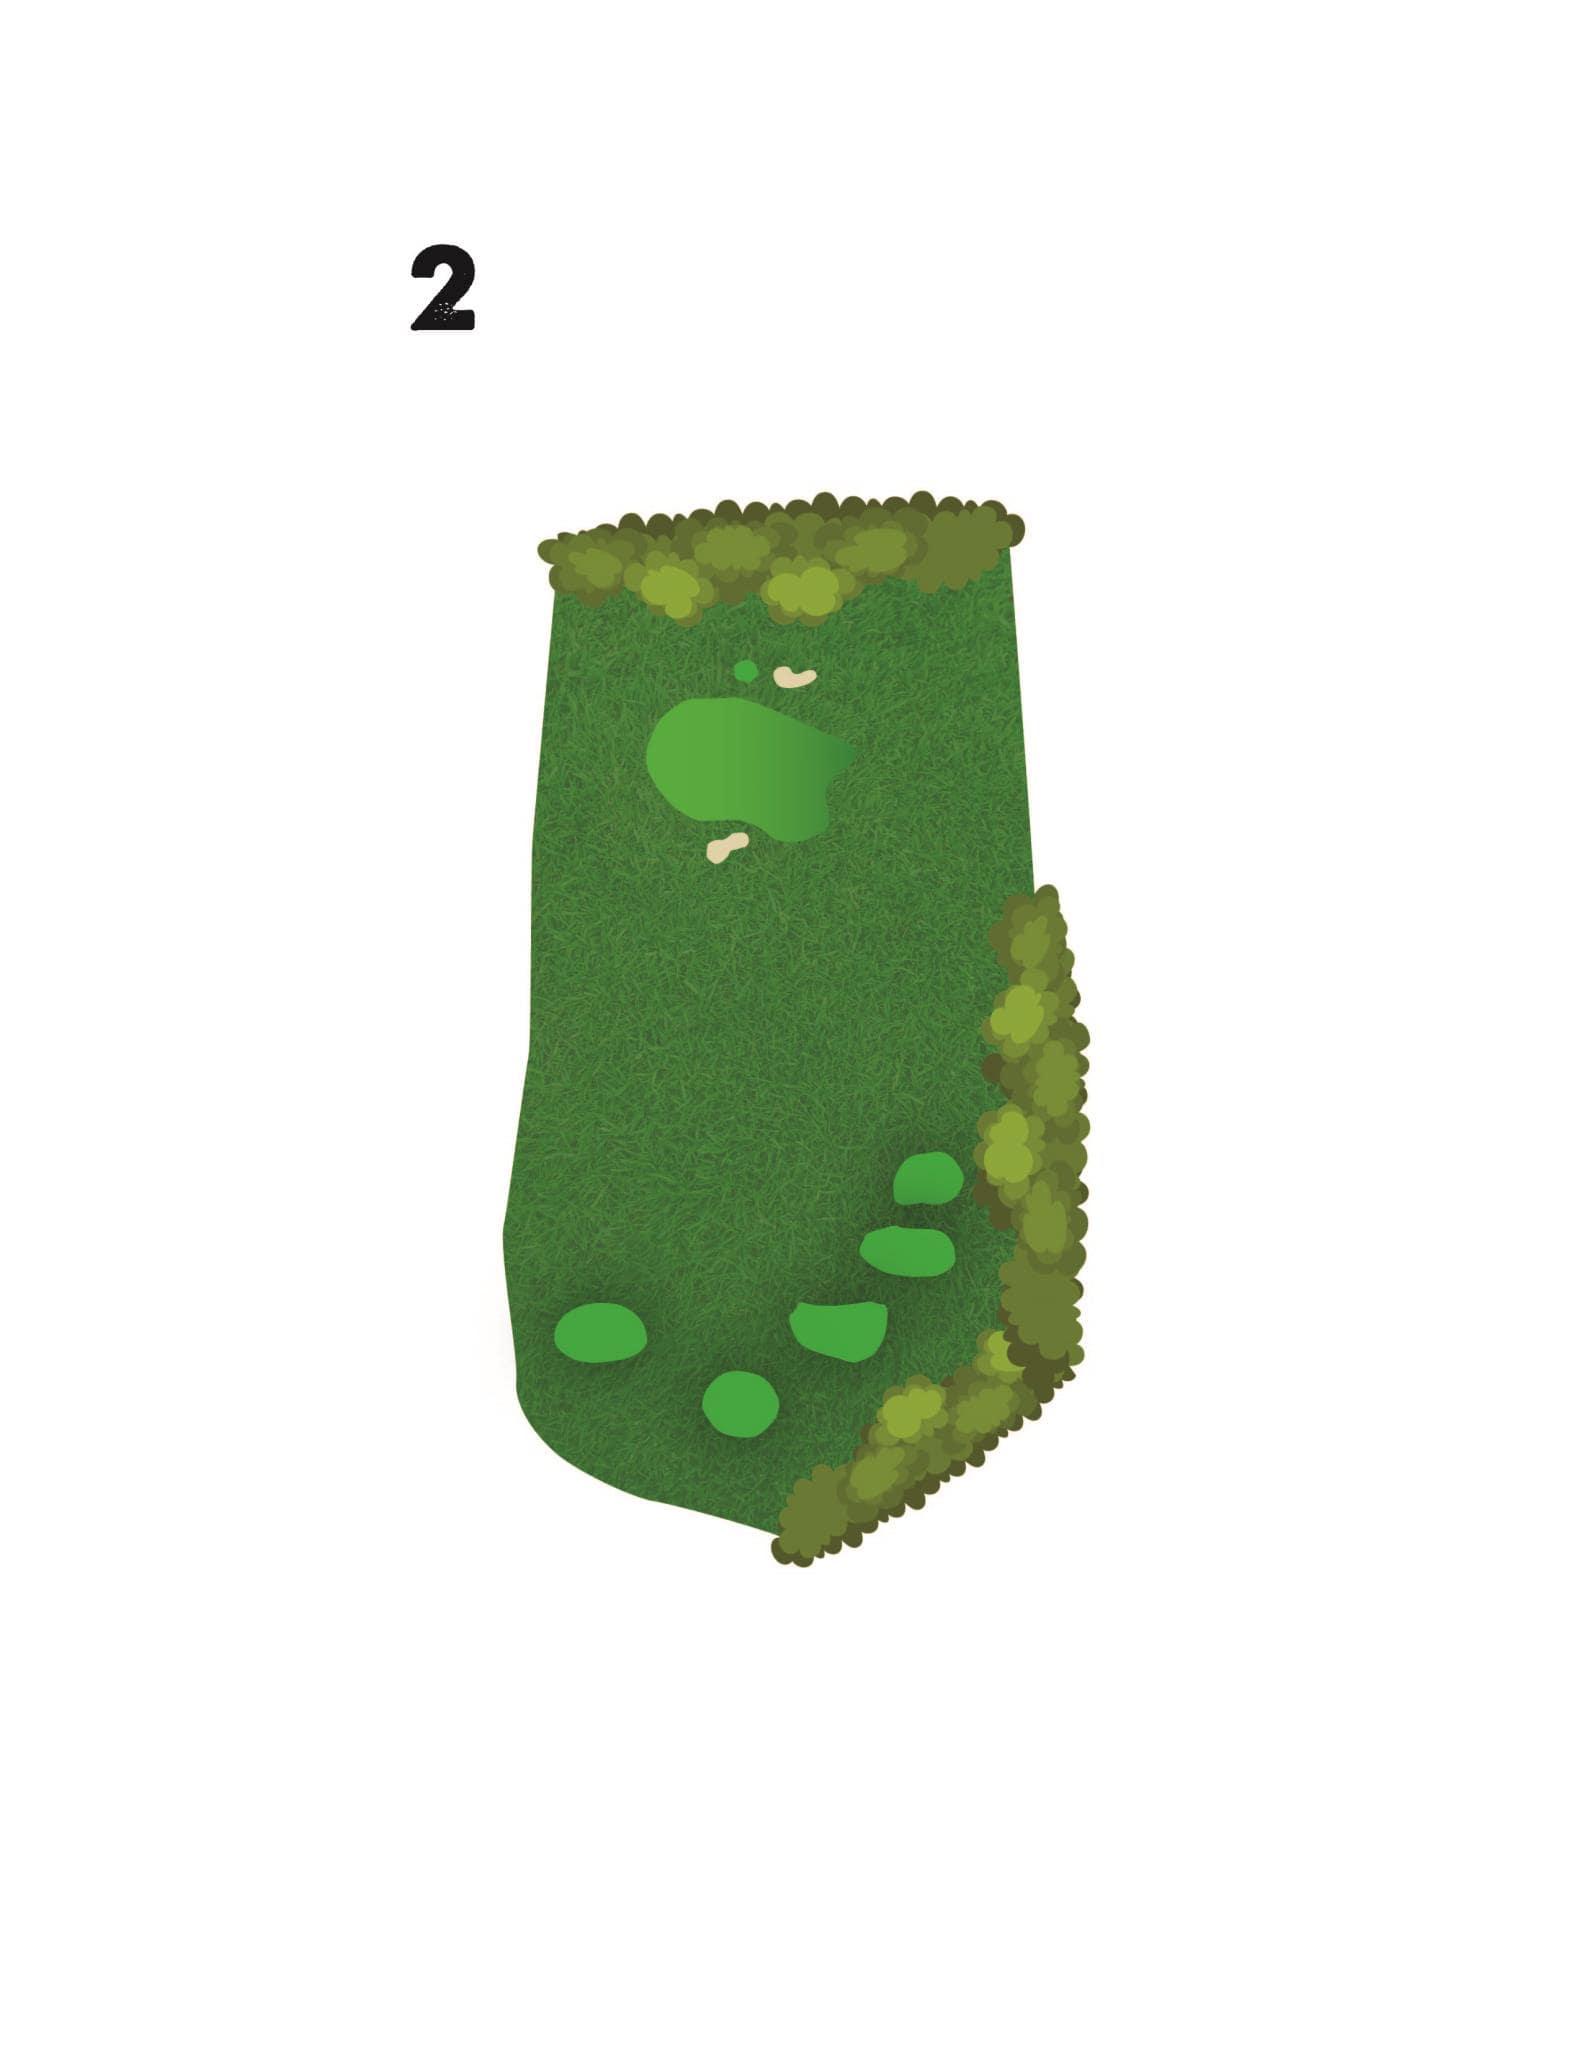
The 2nd hole is the first of four par 3’s at the Creek. By far the shortest hole on the course, don’t fall asleep on this tee shot. Playing significantly downhill, dialing in the correct yardage here is extremely important because a big number awaits if you miss the green long here.
Hole #3
- Par 4
- Men's Handicap: 3
- Women's Handicap: 7
- 392
- 355
- 322
- 287
Hole Description
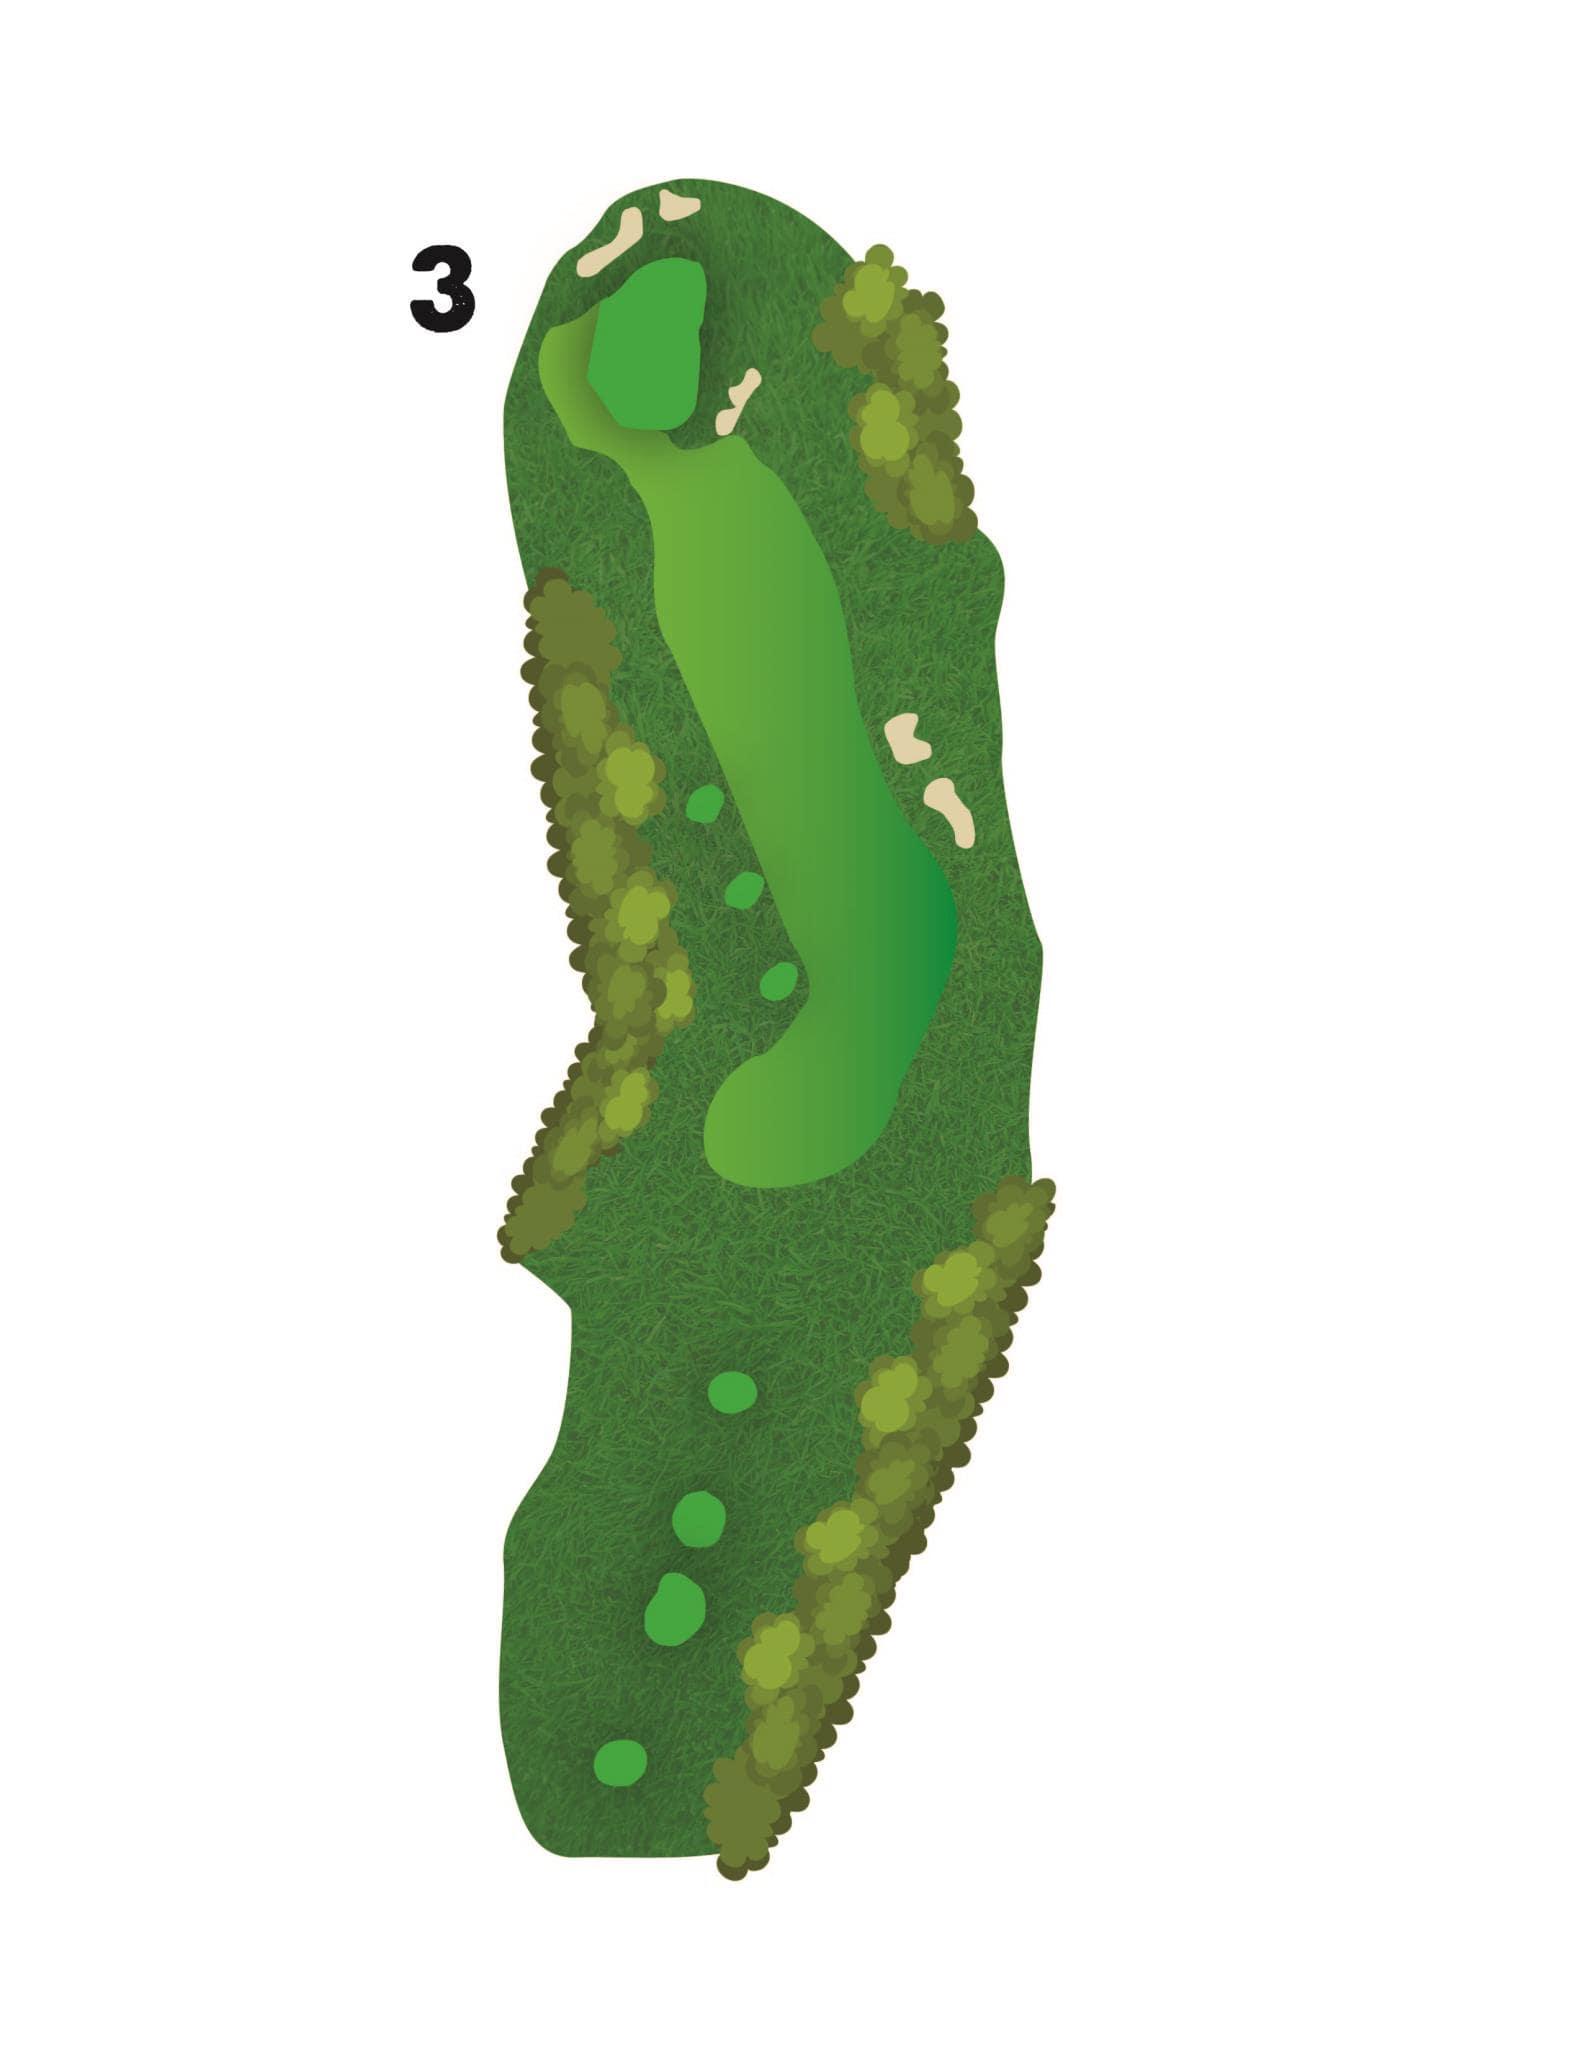
The 3rd hole is a slight dogleg to the left with two sand traps on the right side of the fairway off the tee. The approach shot here requires precision as this is a deep green that sits slightly elevated with a punishing bunker short and right of the green.
Hole #4
- Par 4
- Men's Handicap: 7
- Women's Handicap: 11
- 392
- 374
- 330
- 296
Hole Description
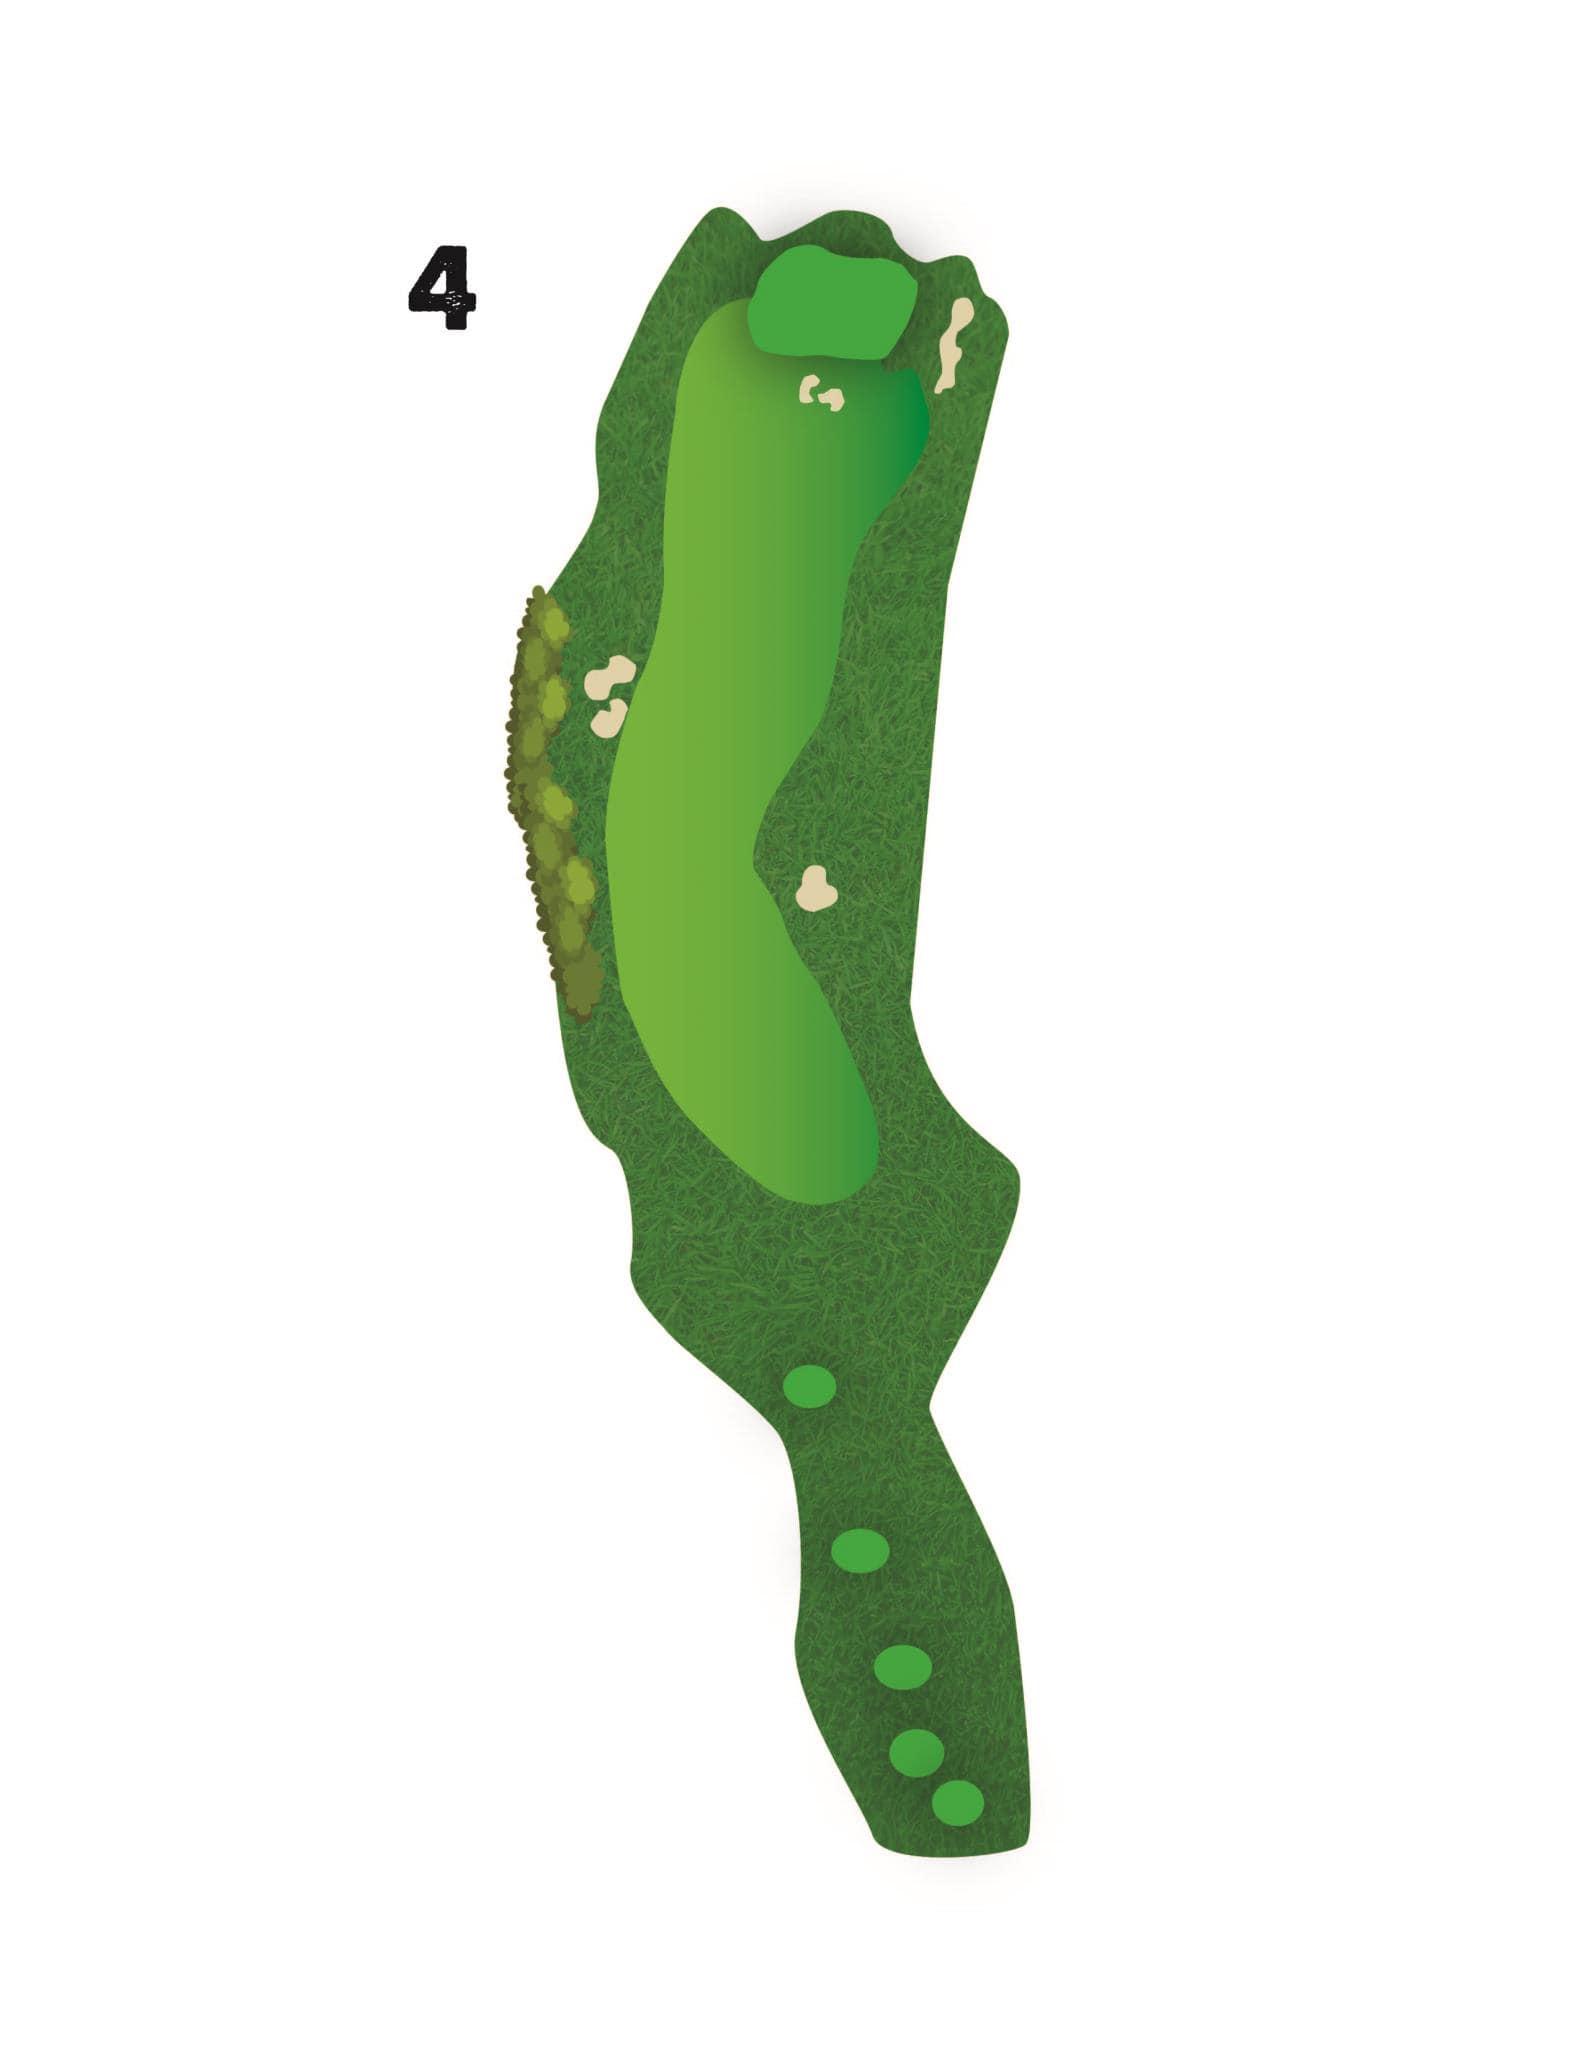
The 4th hole is a straightaway par 4 with out of bounds left and penalty area to the right. If you find the short grass from this elevated tee shot, you’re in position to take advantage of this birdie hole.
Hole #5
- Par 4
- Men's Handicap: 9
- Women's Handicap: 3
- 424
- 394
- 355
- 310
Hole Description
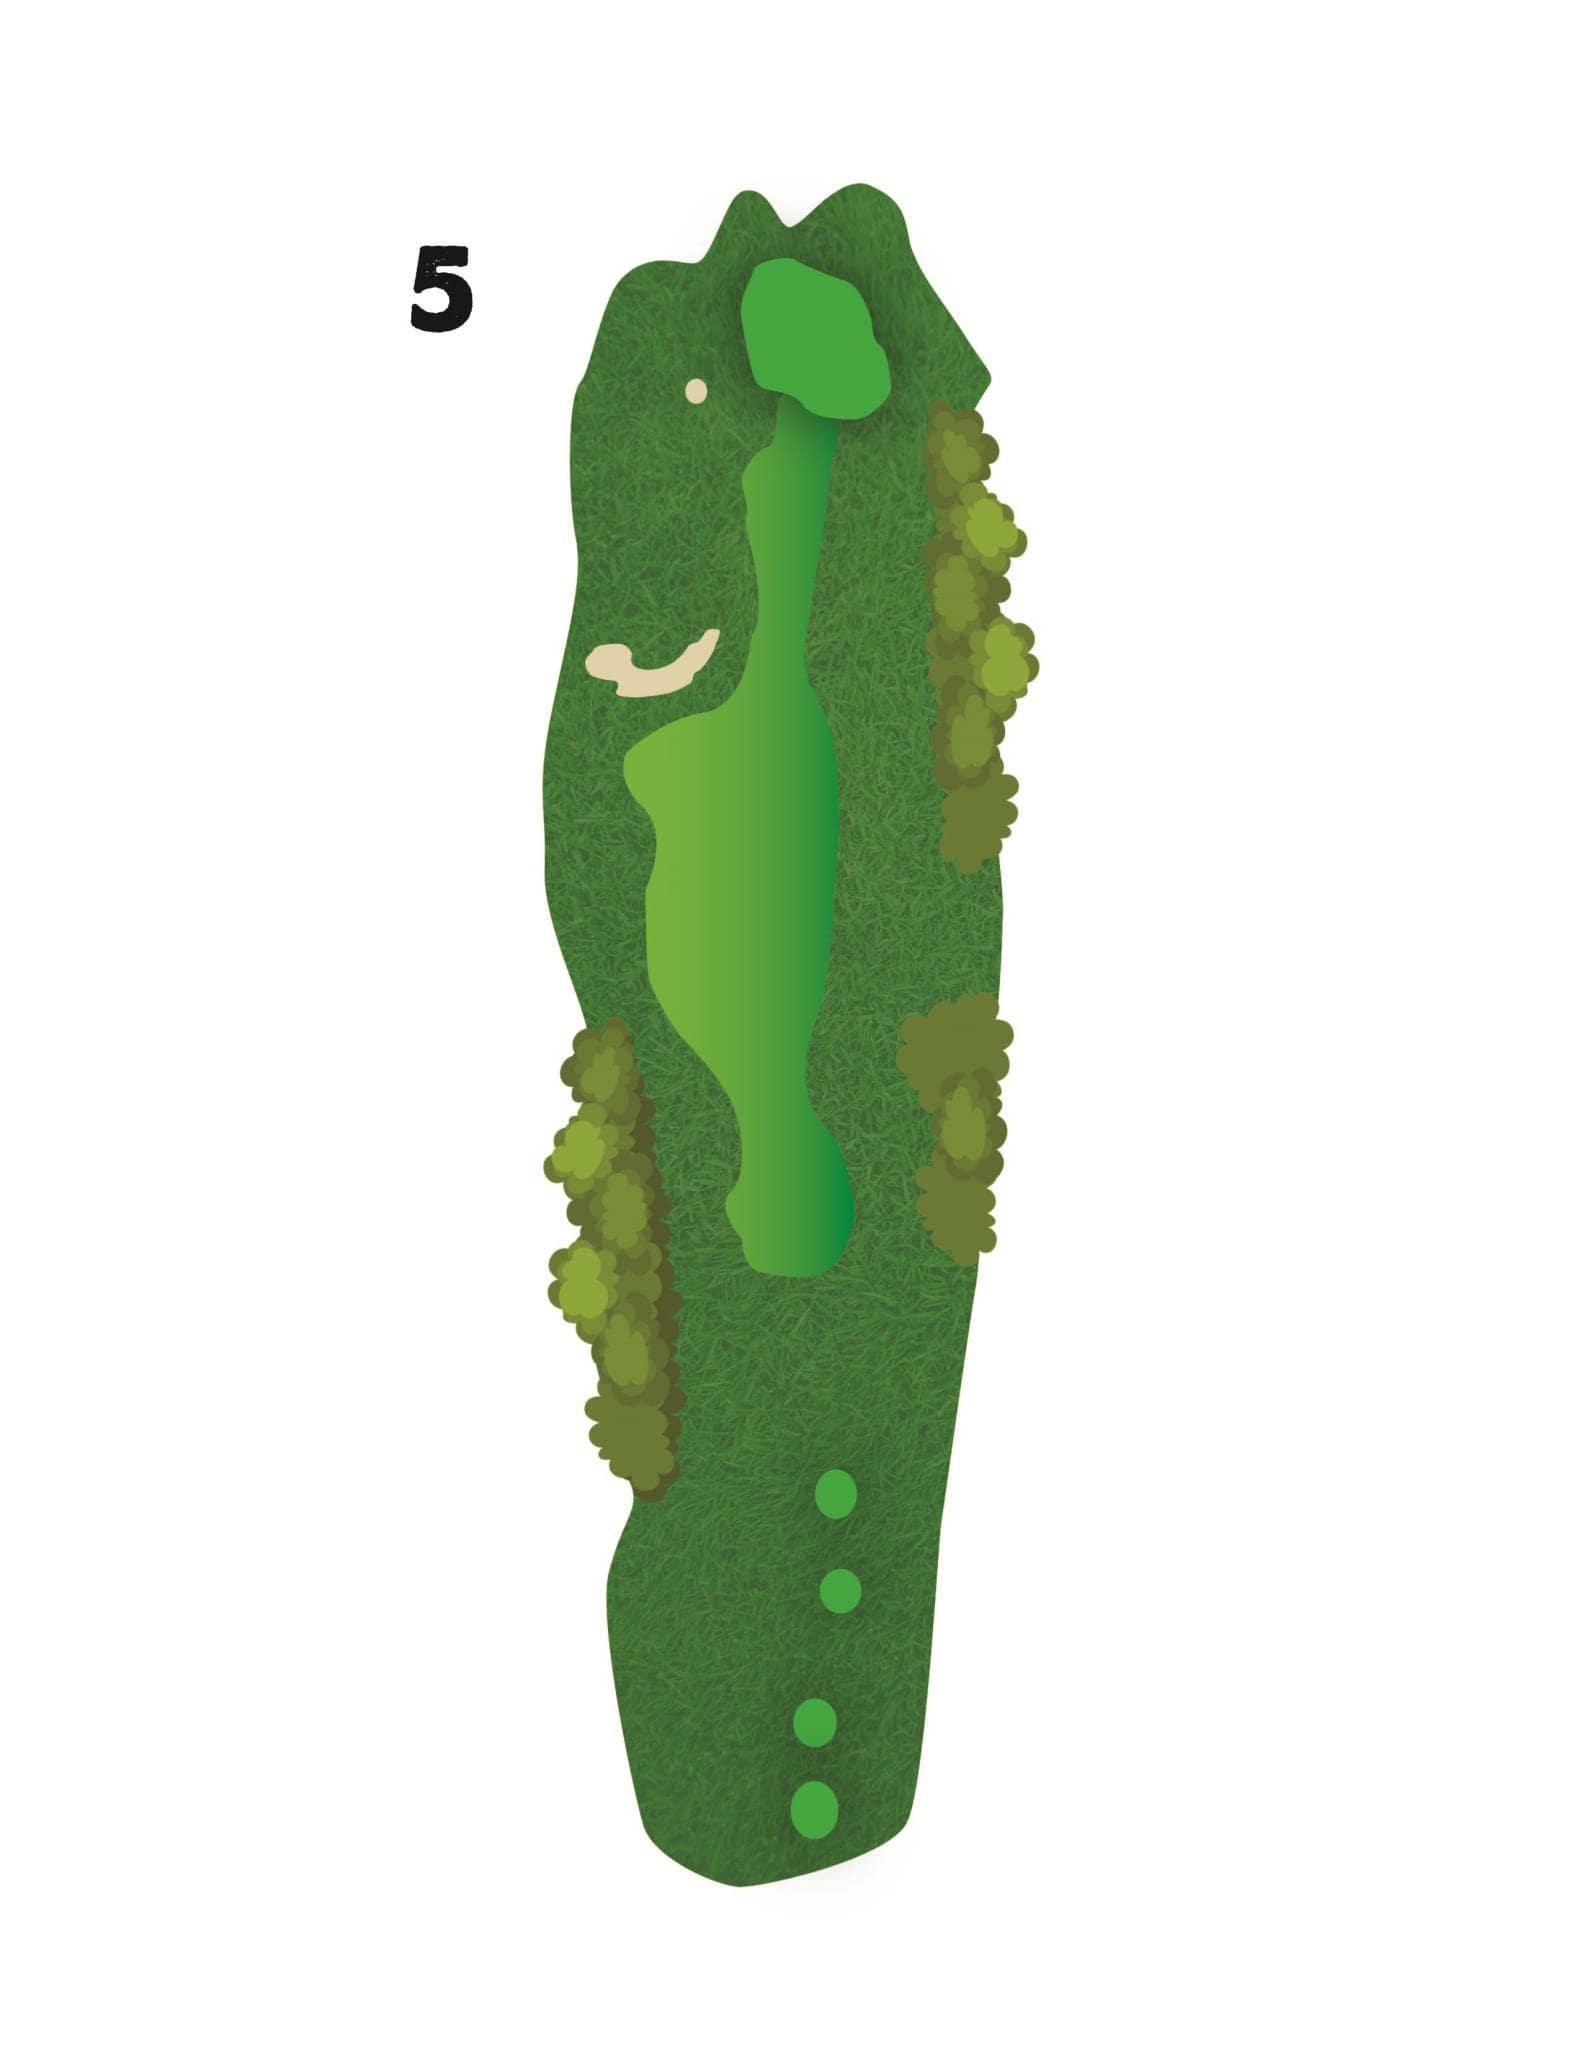
The 5th hole is arguably the most difficult on the opening nine. With ample room off the tee, the approach shot can be deceiving. Players are wise to choose an extra club or two when approaching the green or run the risk of coming up short.
Hole #6
- Par 3
- Men's Handicap: 15
- Women's Handicap: 15
- 193
- 170
- 141
- 124
Hole Description
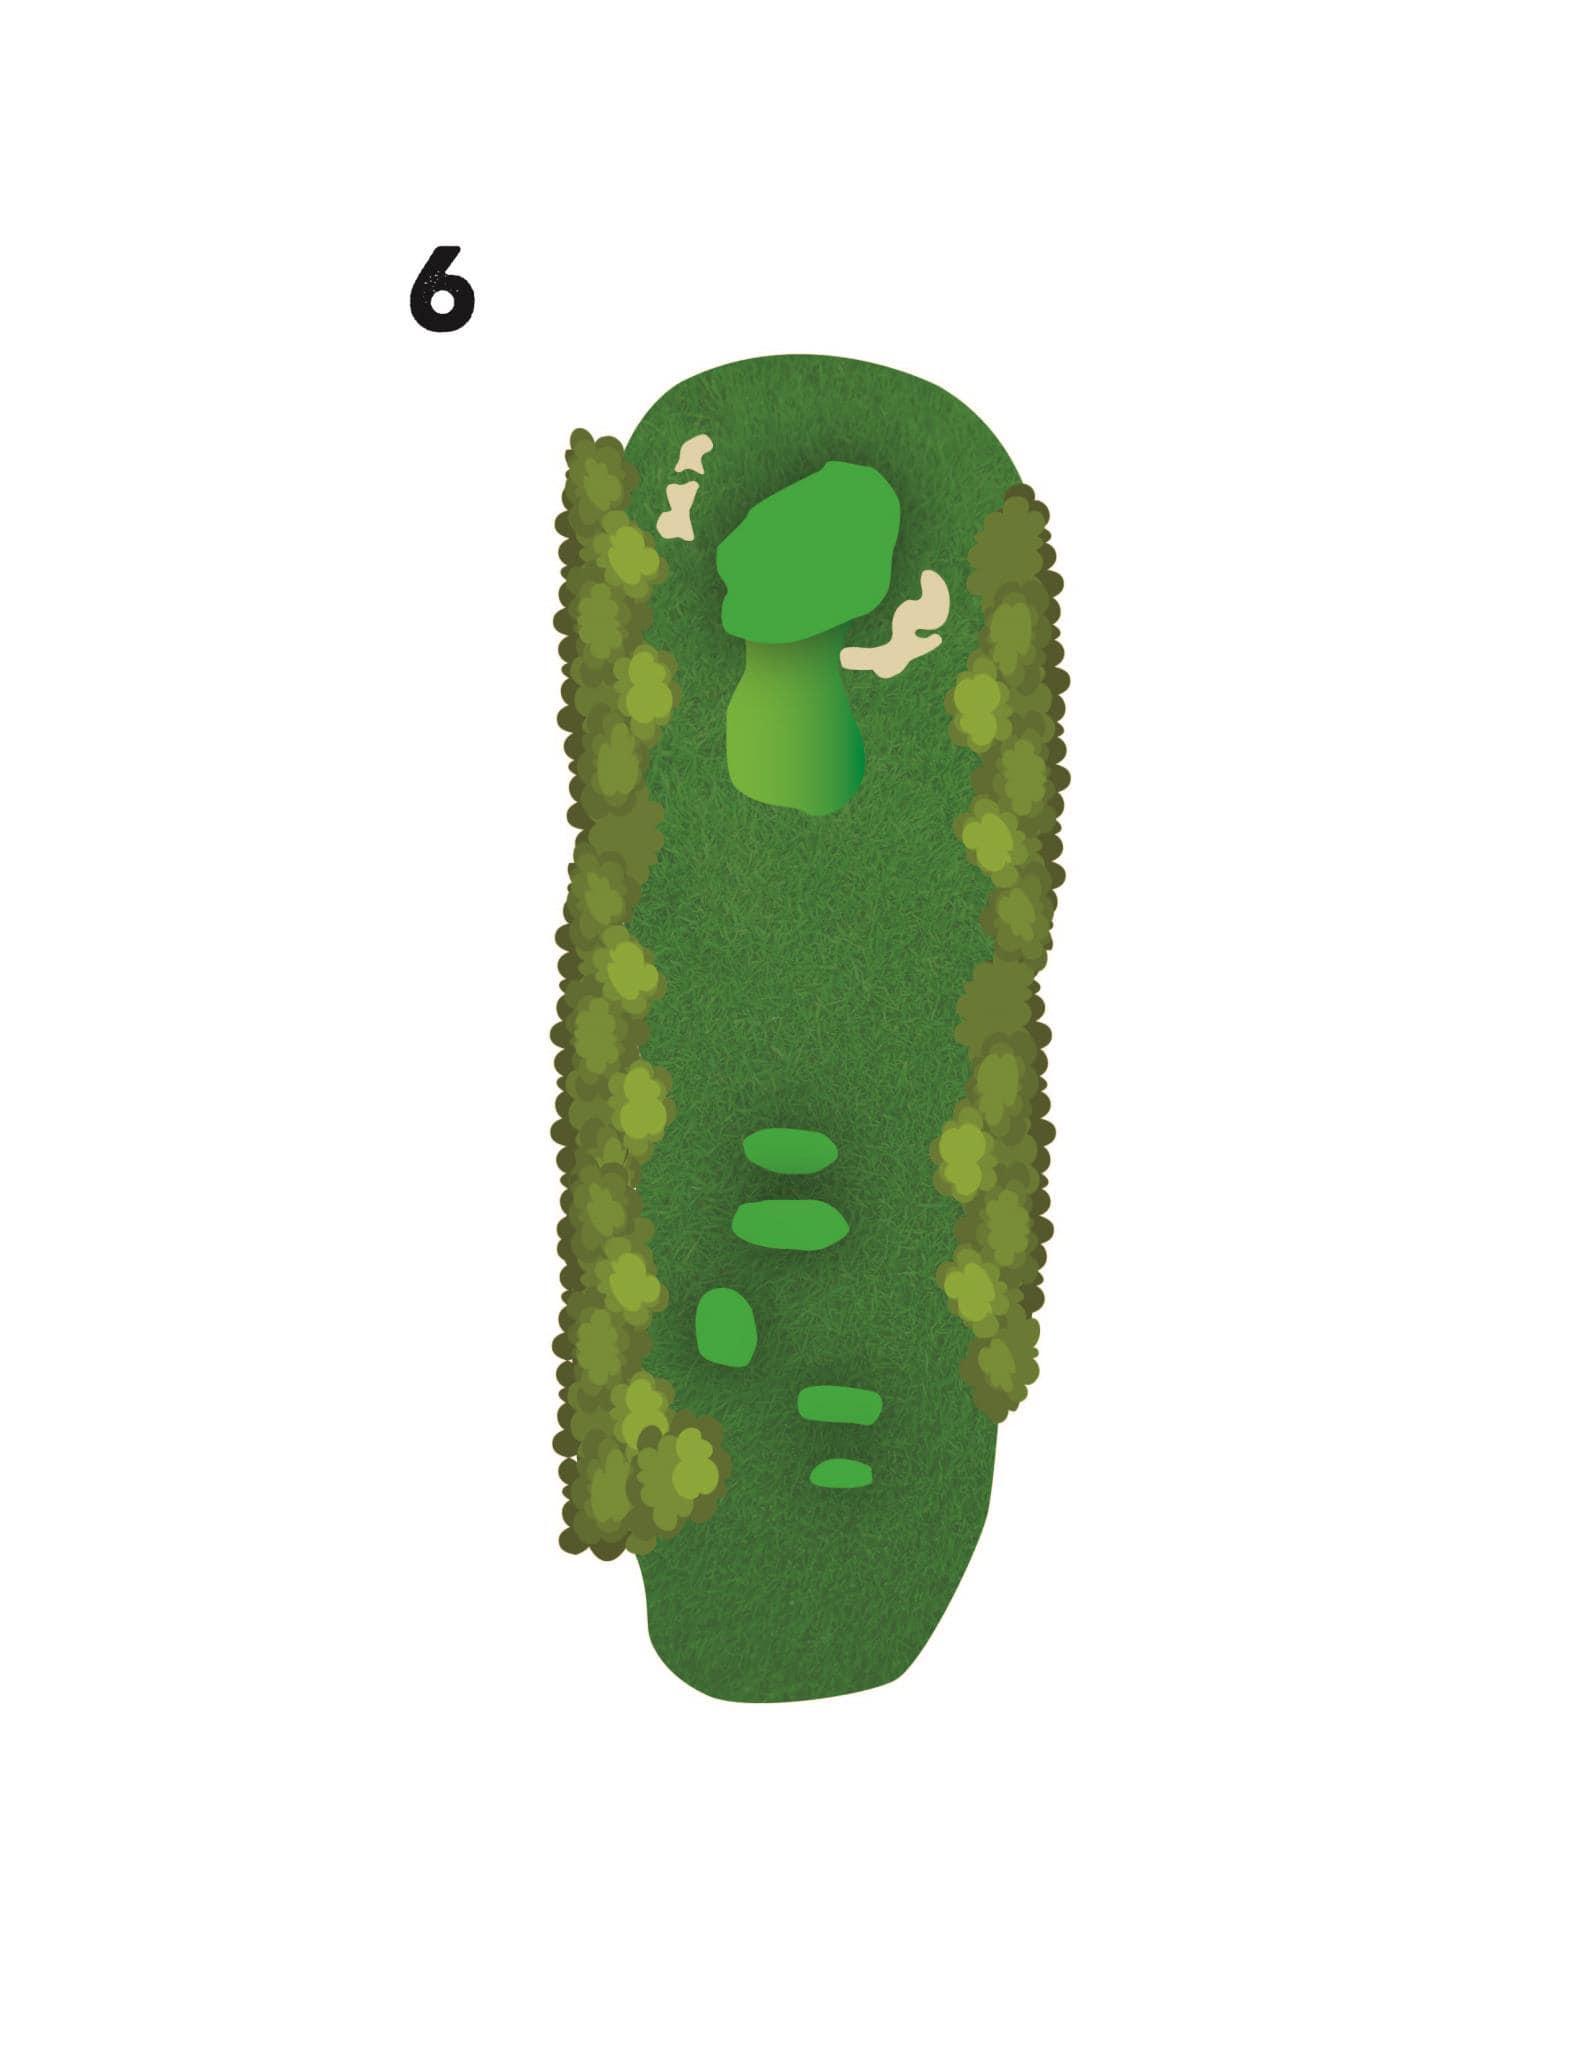
The 6th hole is the 2nd of the four par 3’s. You want to favor the left side of the green here. The right greenside bunker is difficult to navigate, and further right of this hazard leaves the player with a near impossible up and down.
Hole #7
- Par 4
- Men's Handicap: 13
- Women's Handicap: 13
- 388
- 363
- 325
- 290
Hole Description
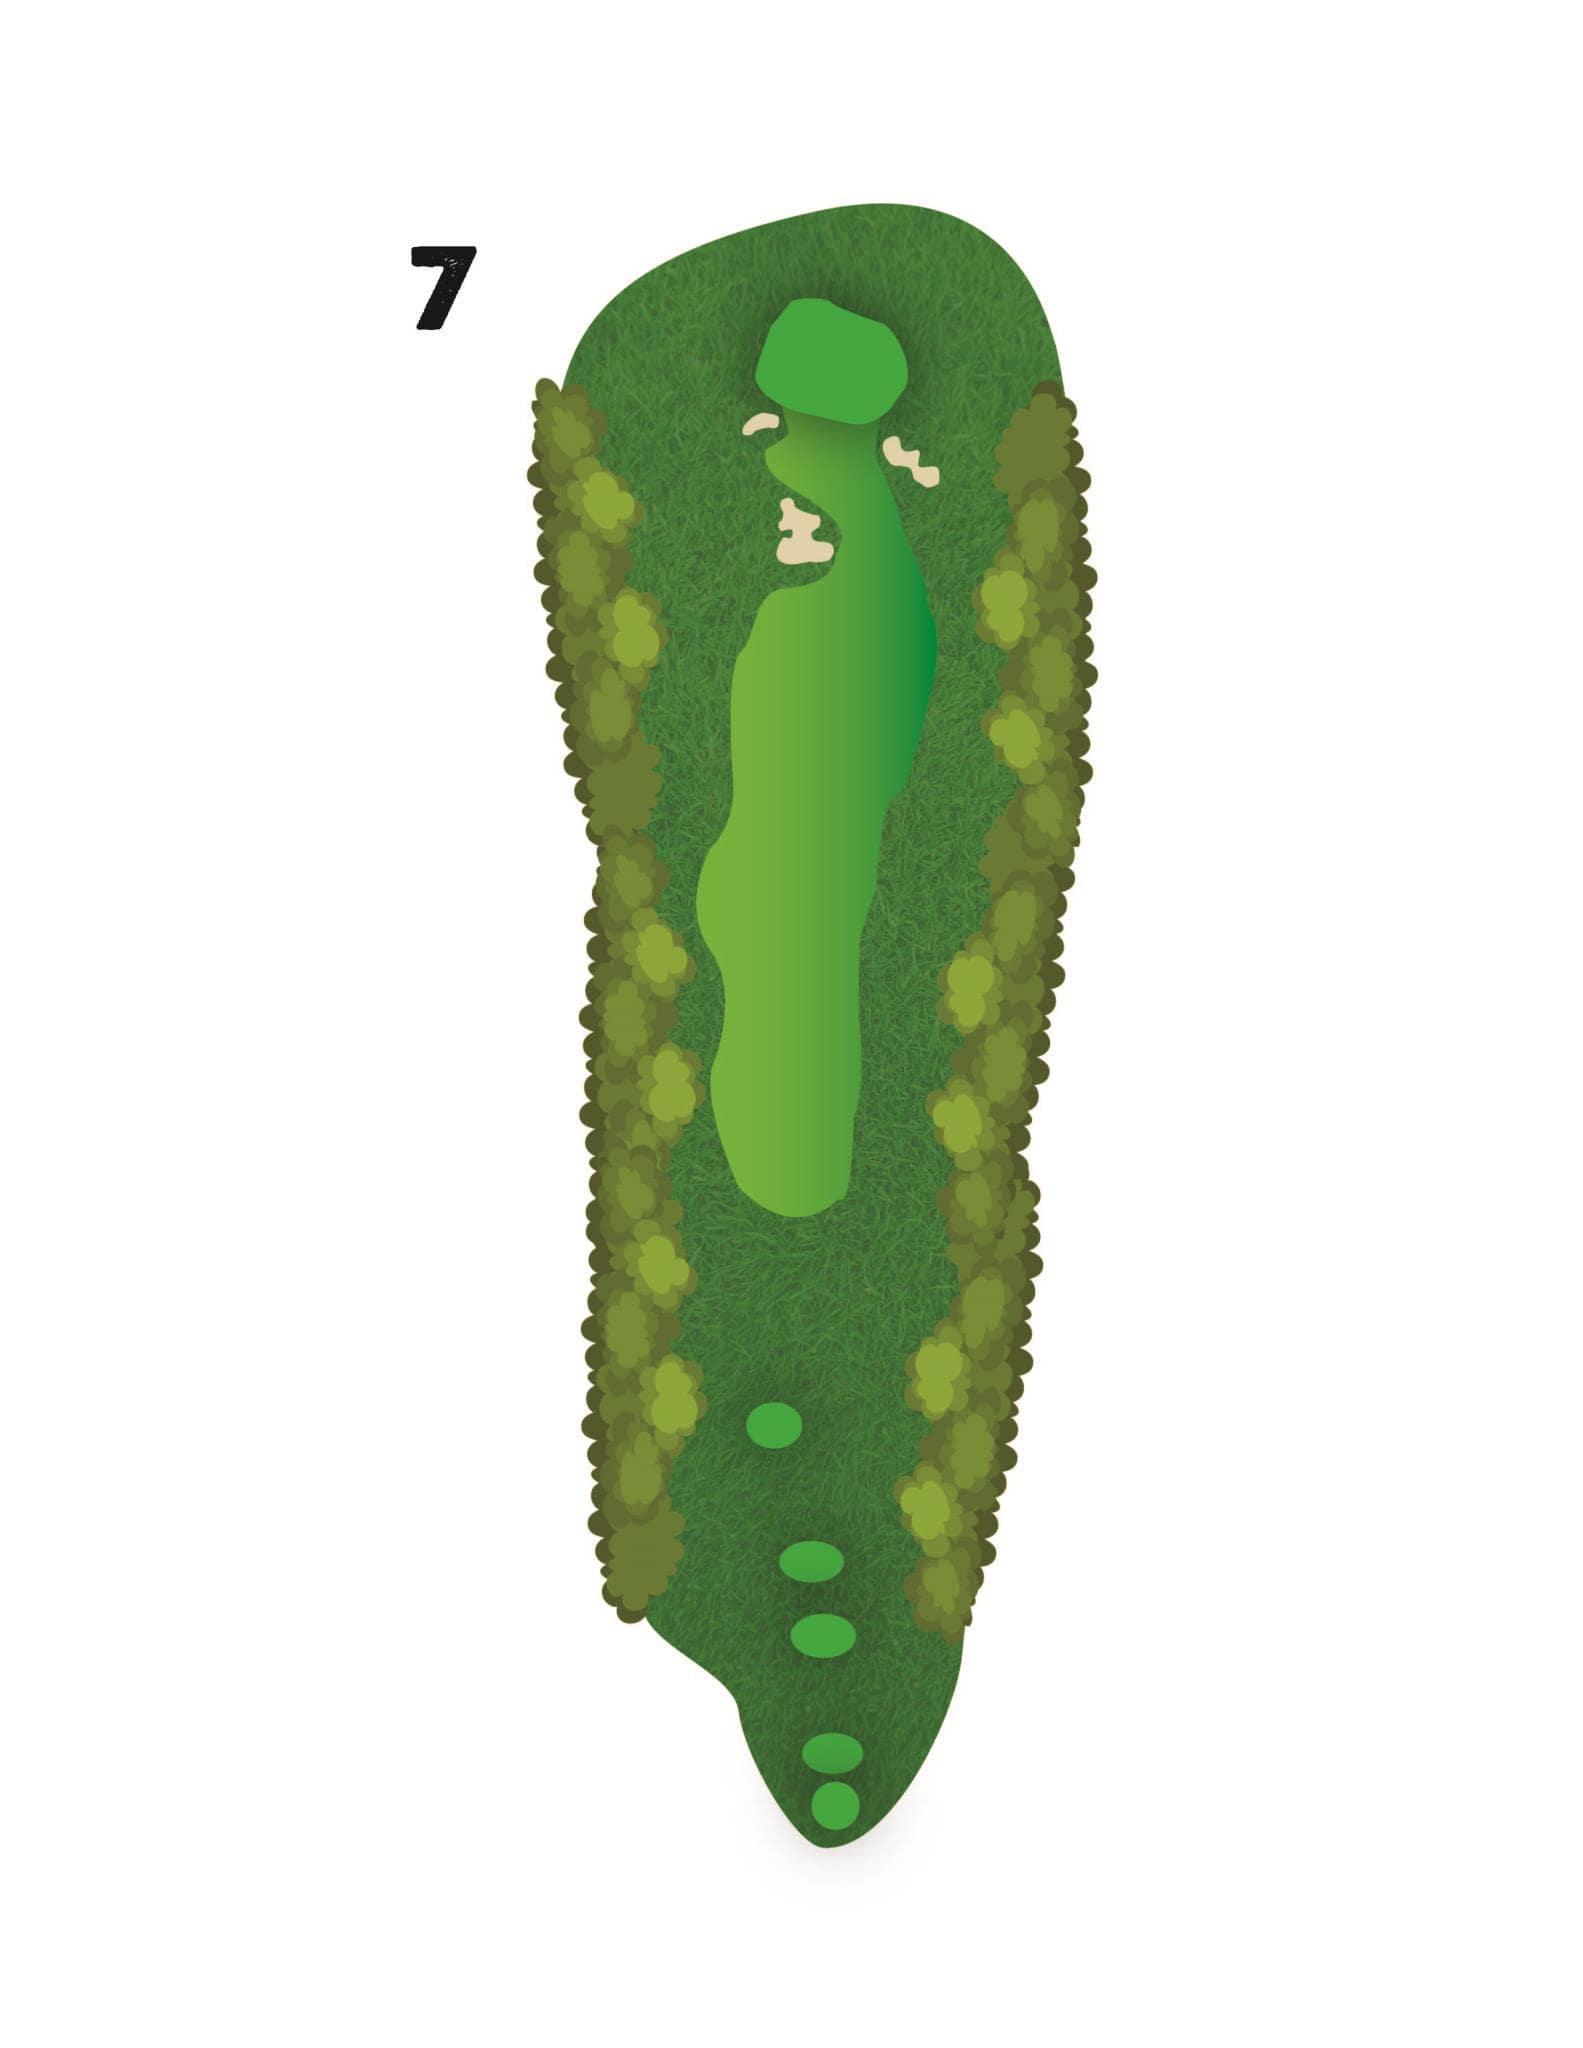
The 7th hole is a short, straightaway, par 4. Be careful off the tee as golf balls tend to lean right here and out of bounds is just a couple feet right of the cart path. Find the fairway though, and it’s time to go flag hunting!
Hole #8
- Par 5
- Men's Handicap: 1
- Women's Handicap: 1
- 536
- 509
- 488
- 386
Hole Description
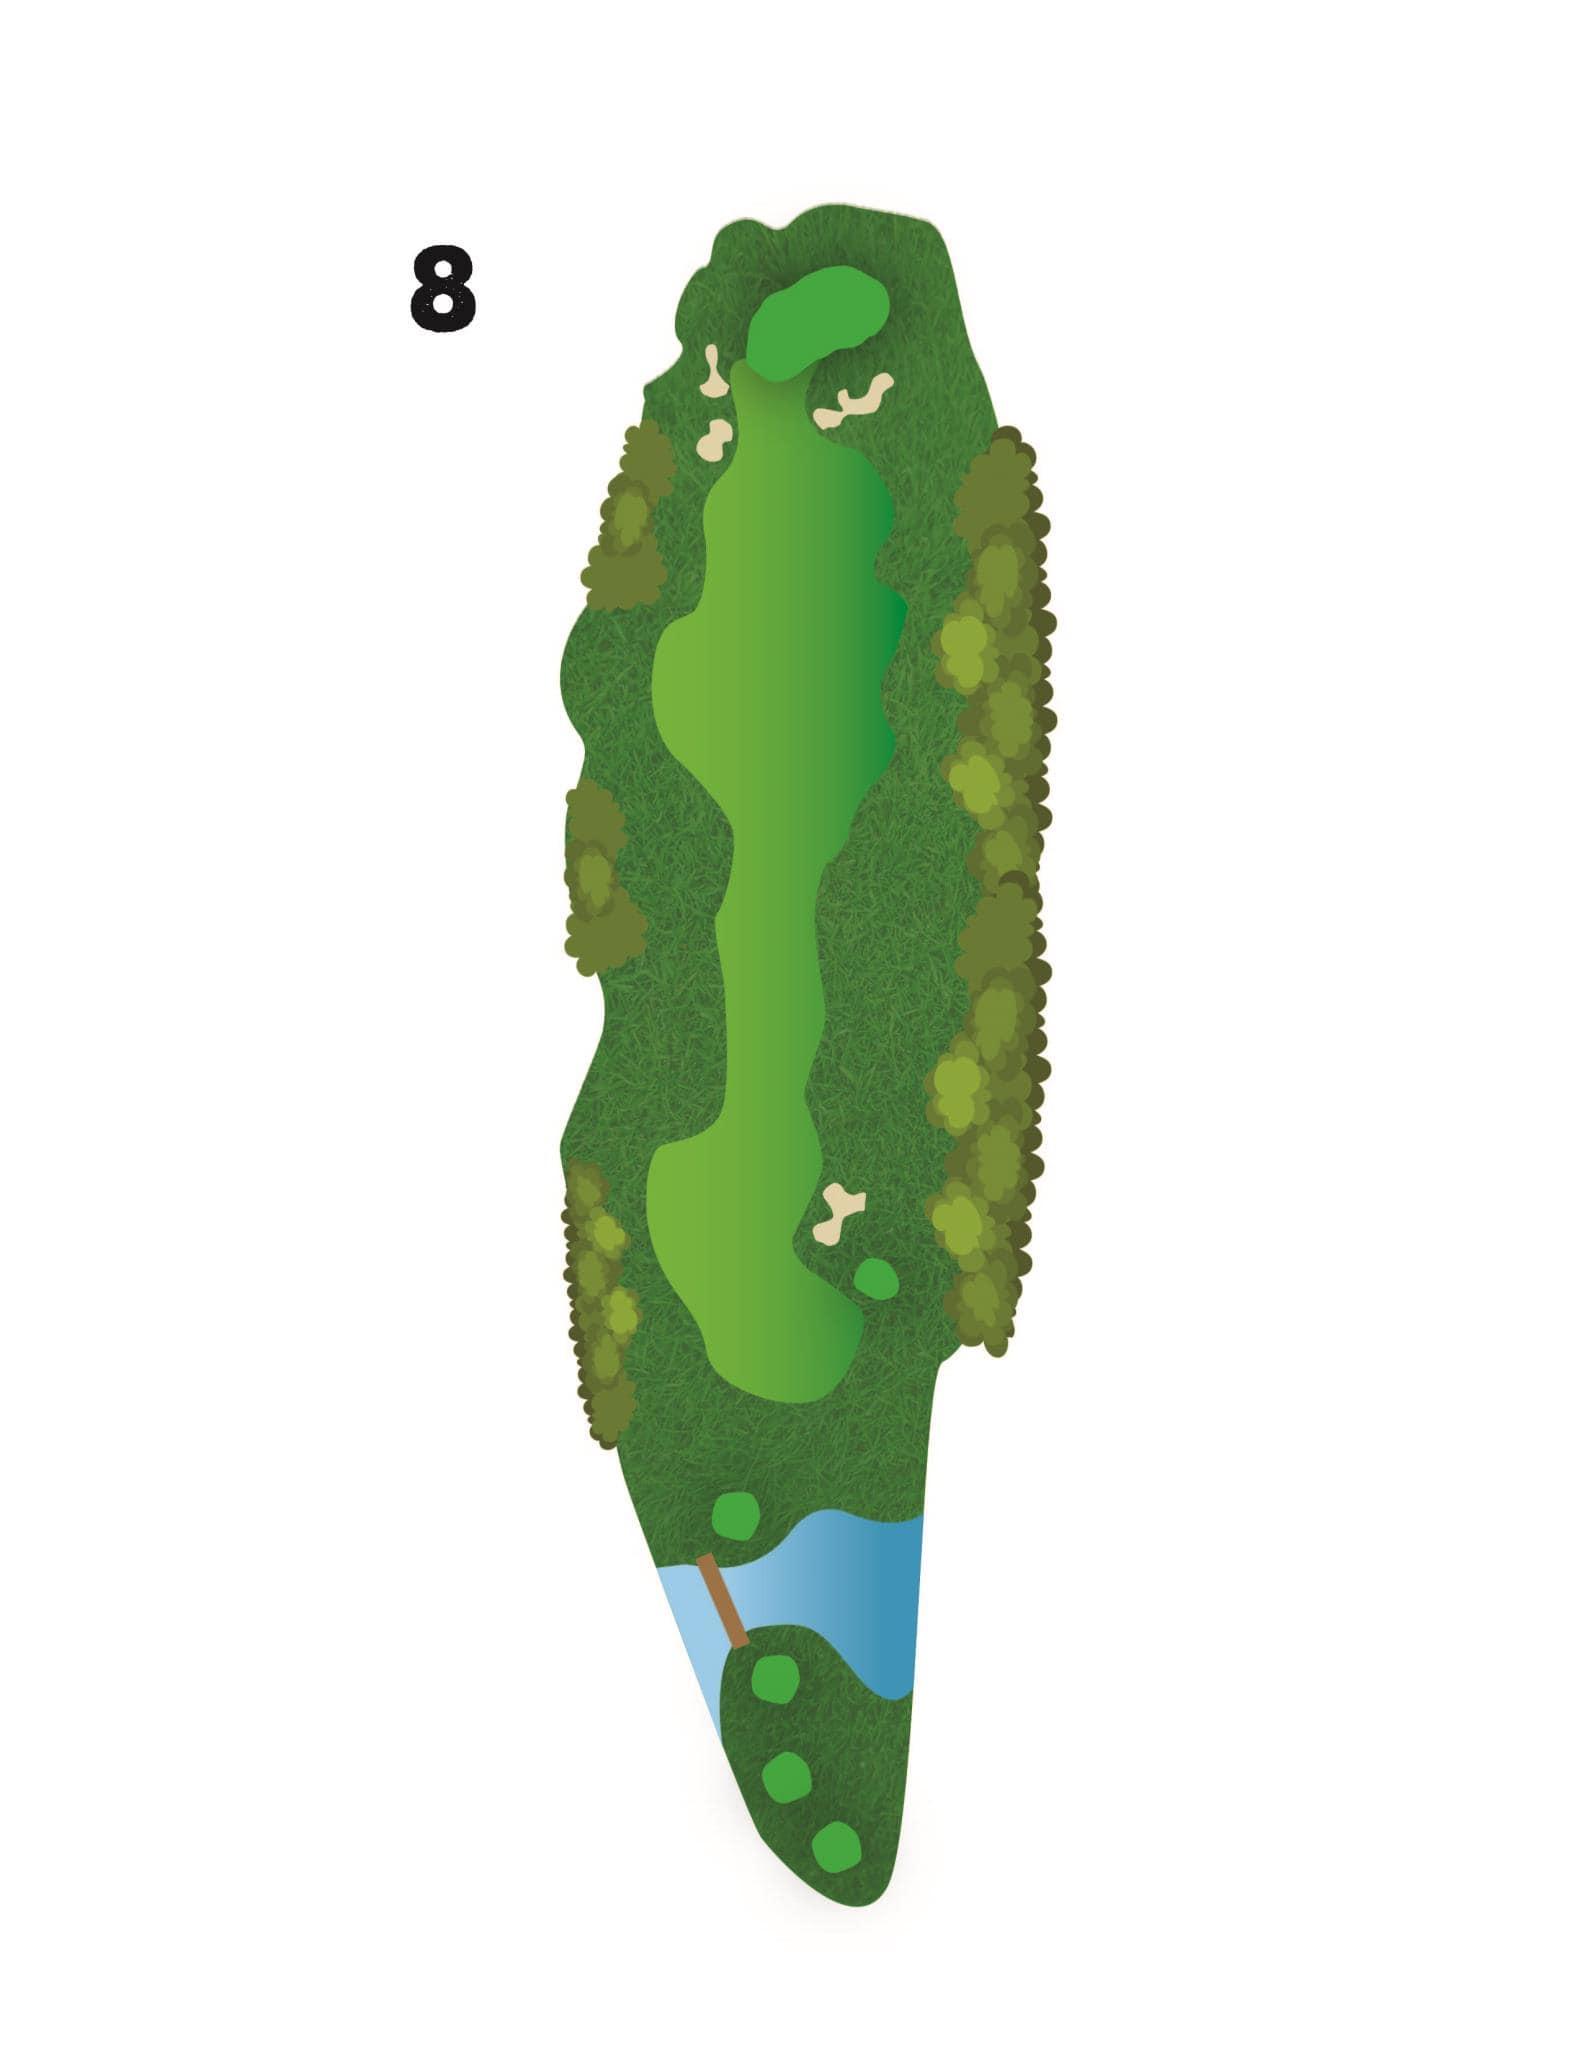
The 8th hole is an uphill 3-shot par 5. Carry the water off the tee, avoid the plus size sand trap on the right, then it’s uphill the rest of the way to the green. Your lay-up is tricky with a sucker bunker right in the middle of the fairway. You don’t want your ball to find its way in here. The approach shot is blind and the green is tricky, so stay in the short grass.
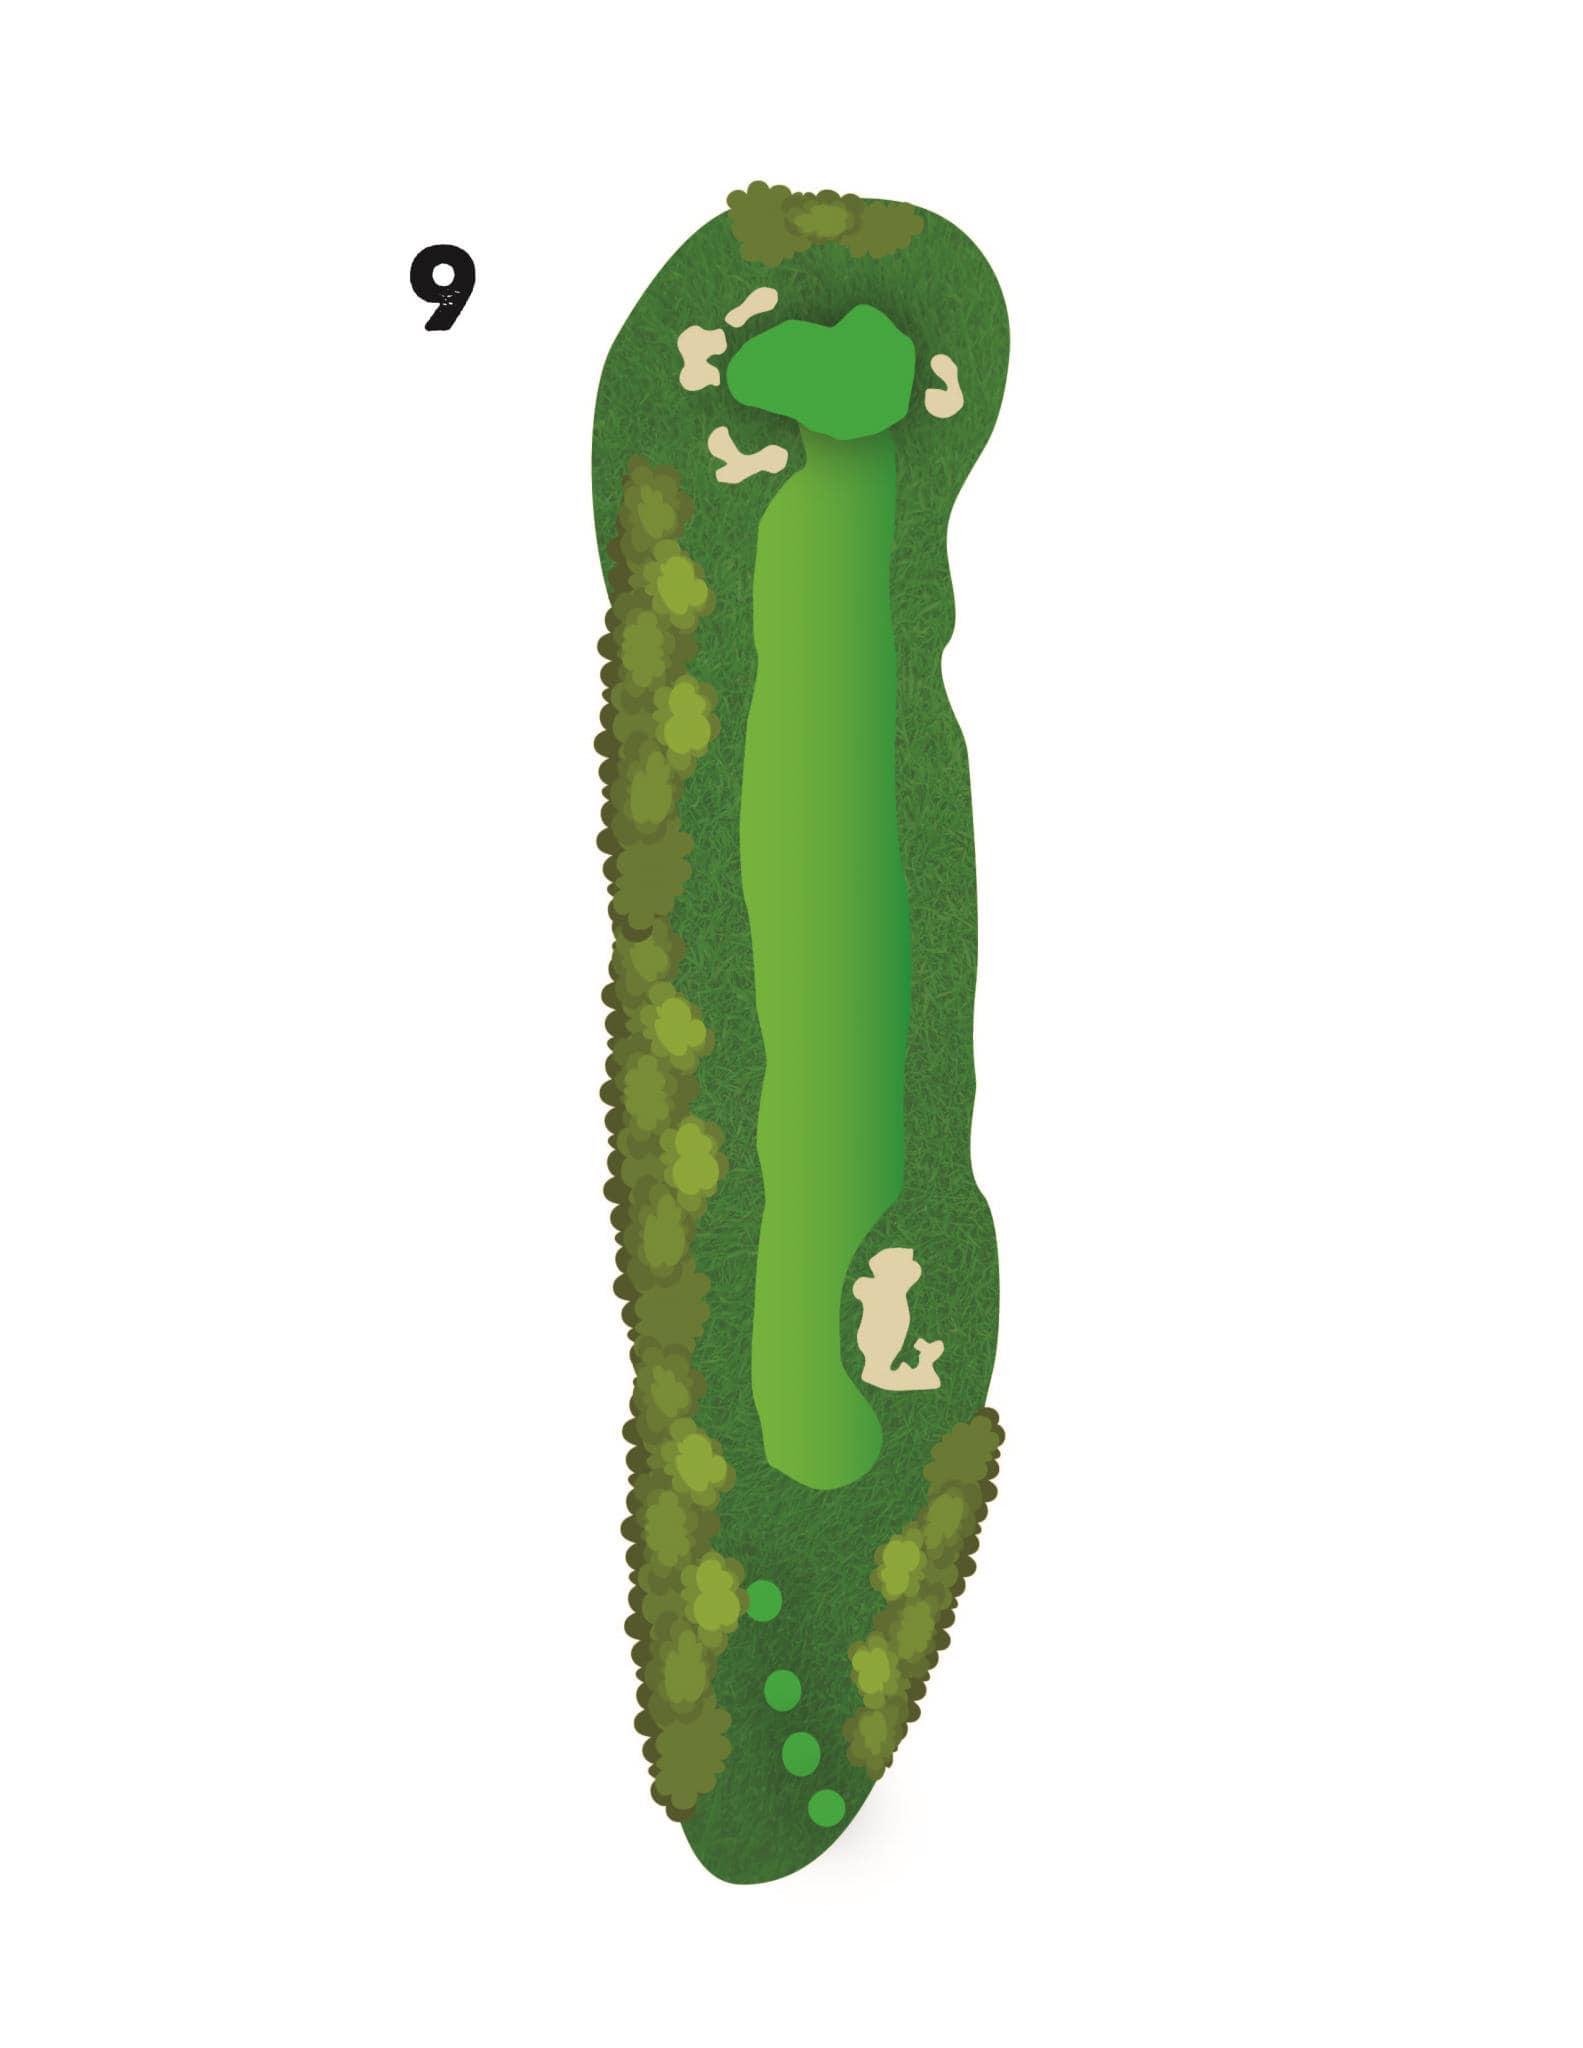
Hole #9
- Par 4
- Men's Handicap: 11
- Women's Handicap: 9
- 426
- 402
- 377
- 333
Hole Description
The 9th hole is a straightaway par 4 bringing you back to the clubhouse. The tee shot has a generous landing area. But hit a good one, because the 9th green is perhaps the toughest on the course. Divided into 3 distinct sections, you want to be on the right side of the hole here.
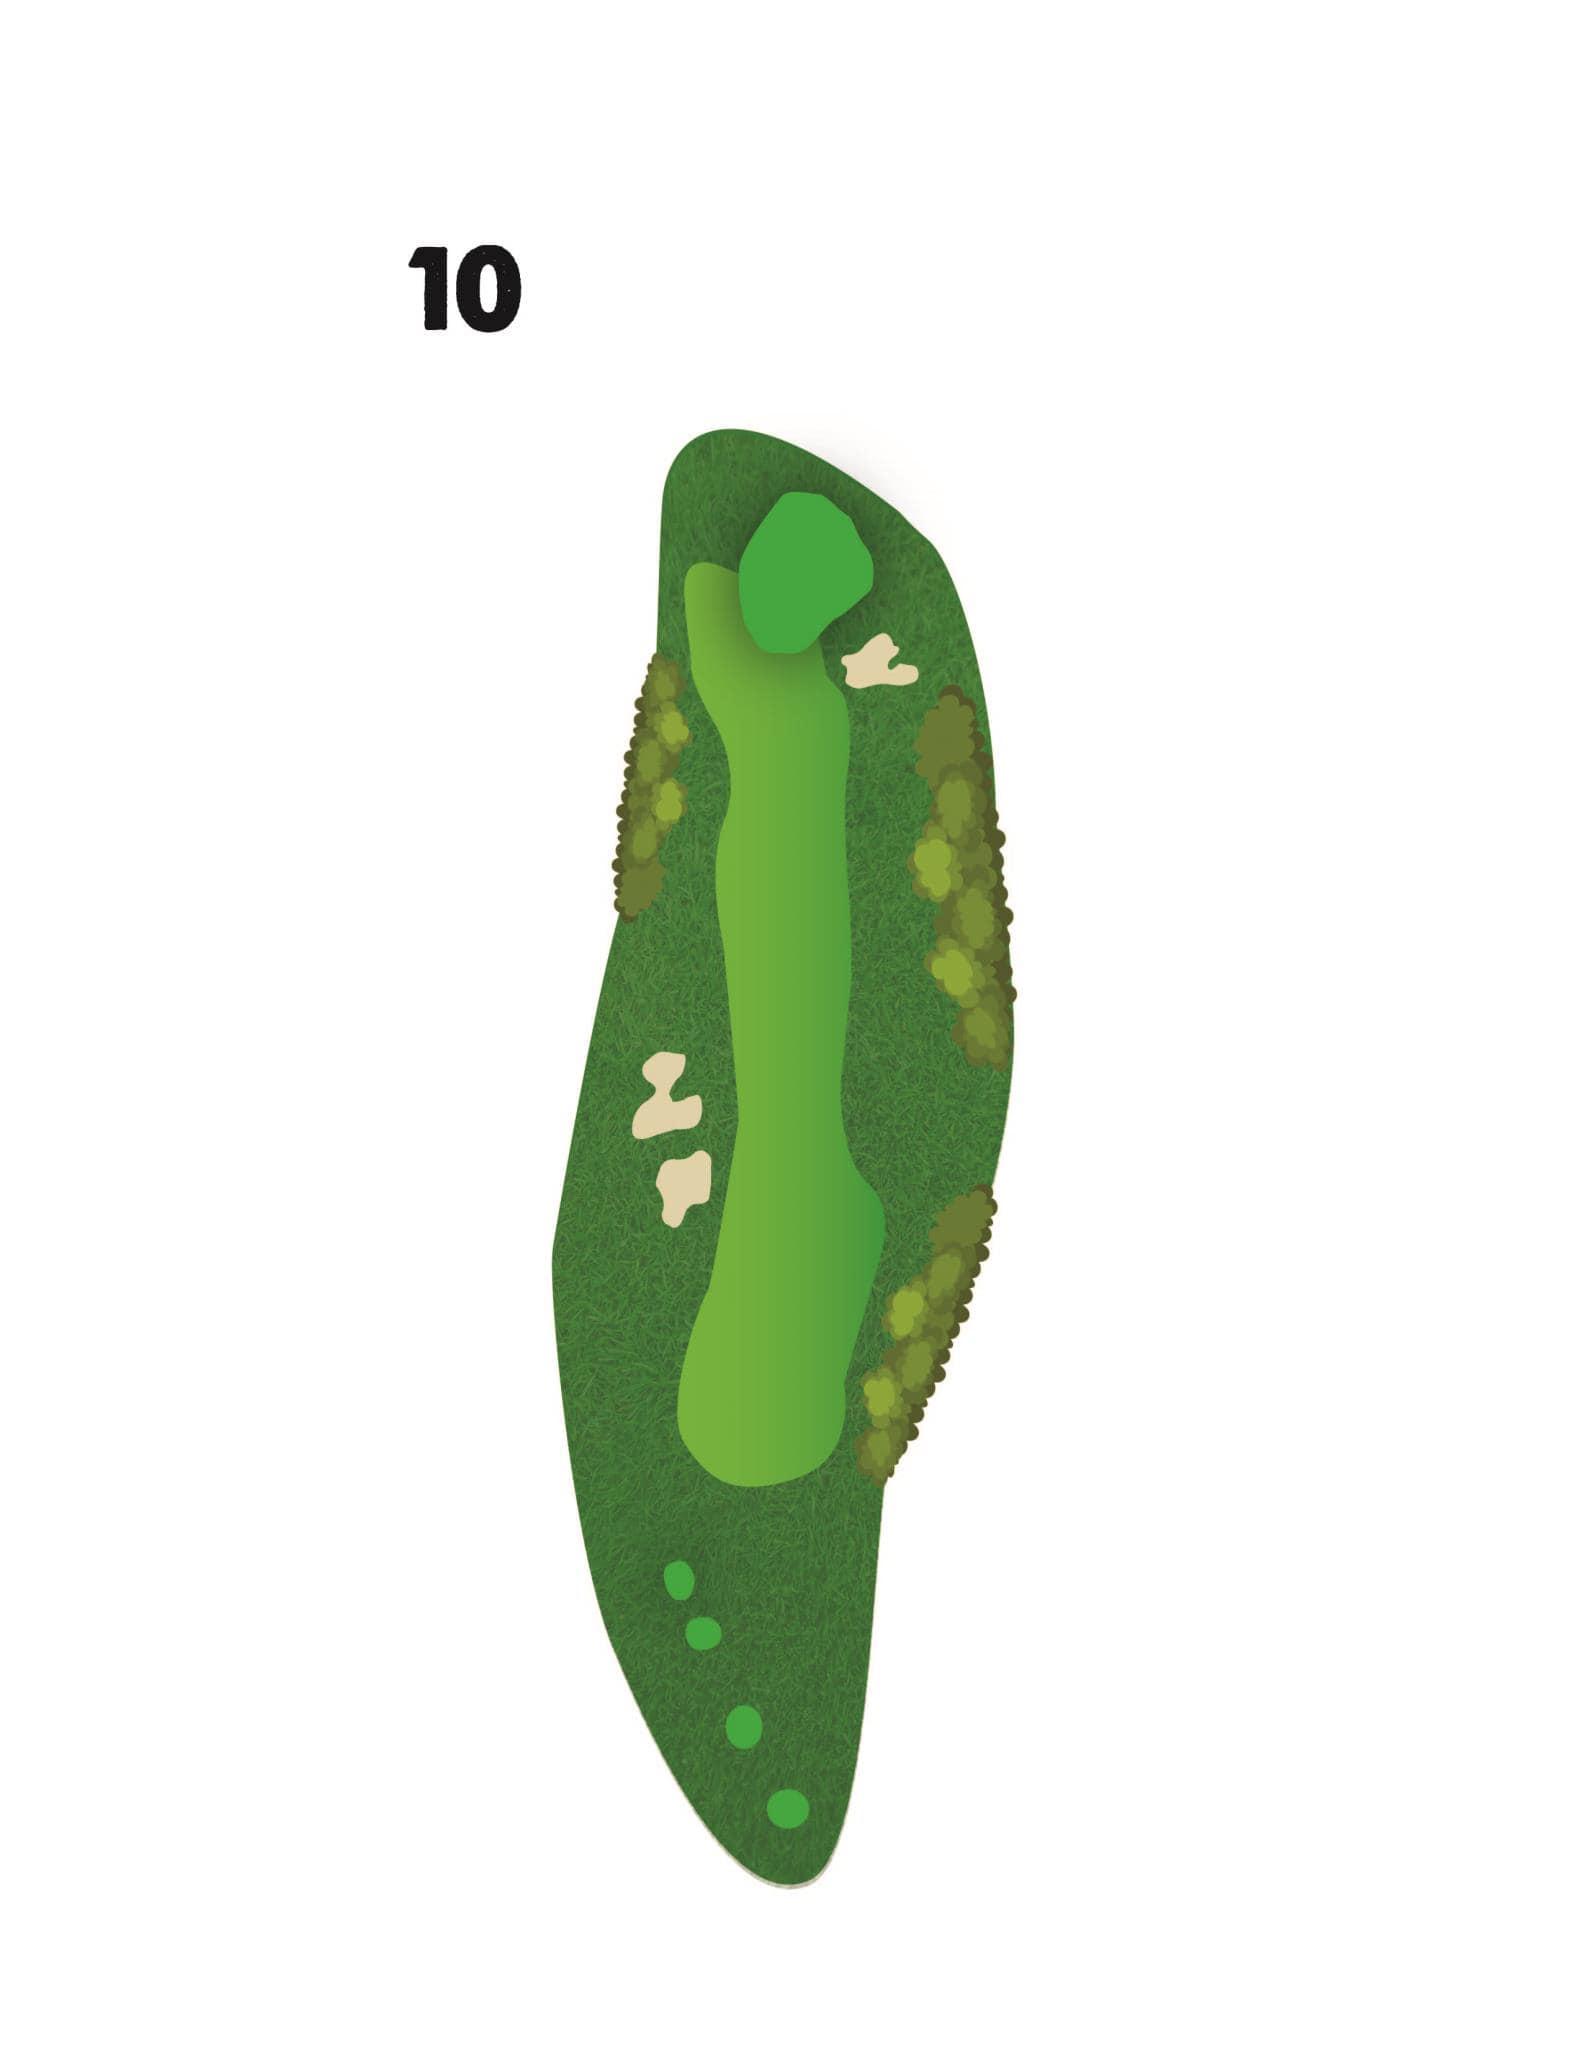
Hole #10
- Par 4
- Men's Handicap: 8
- Women's Handicap: 14
- 363
- 352
- 327
- 301
Hole Description
After you enjoy a legendary Iron Horse Golf Hotdog, the 10th hole starts you off with a nice wide landing area. Playing uphill the whole way, take an extra club on your approach shot. Quite often the hole plays into the wind as well.
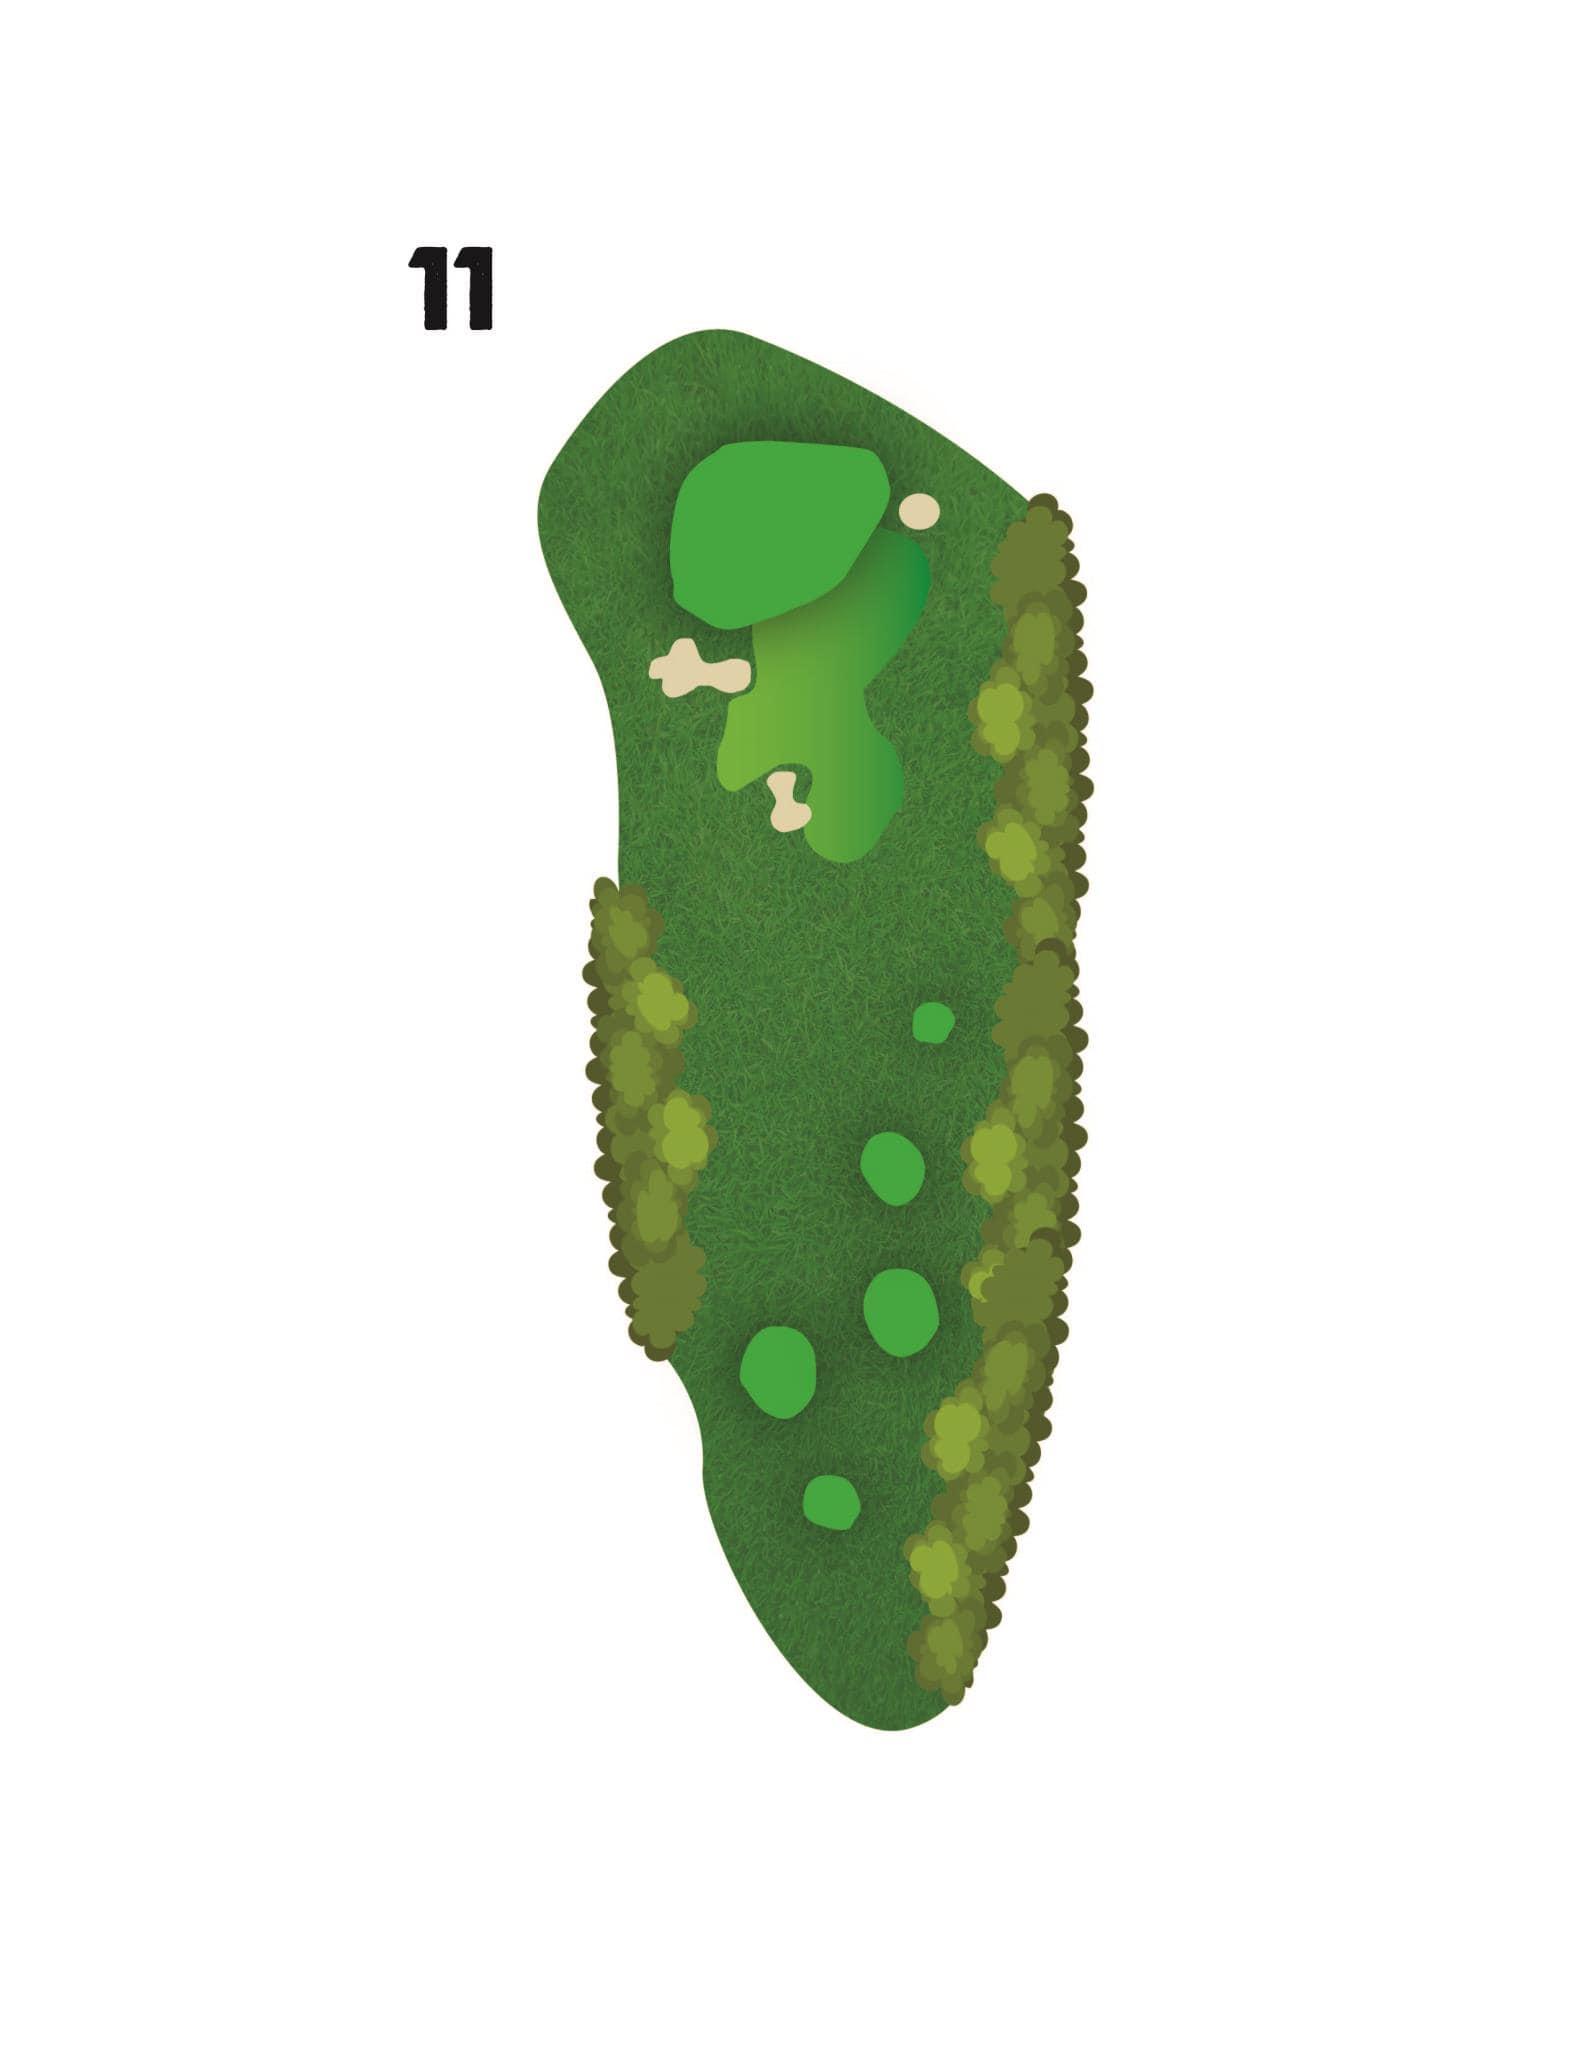
Hole #11
- Par 3
- Men's Handicap: 18
- Women's Handicap: 18
- 203
- 177
- 147
- 110
Hole Description
The 11th hole is the third par 3 on the course, but the 2nd most difficult to navigate. It’s a two-tiered green here, so your distance control must be very good to have a makeable birdie putt.
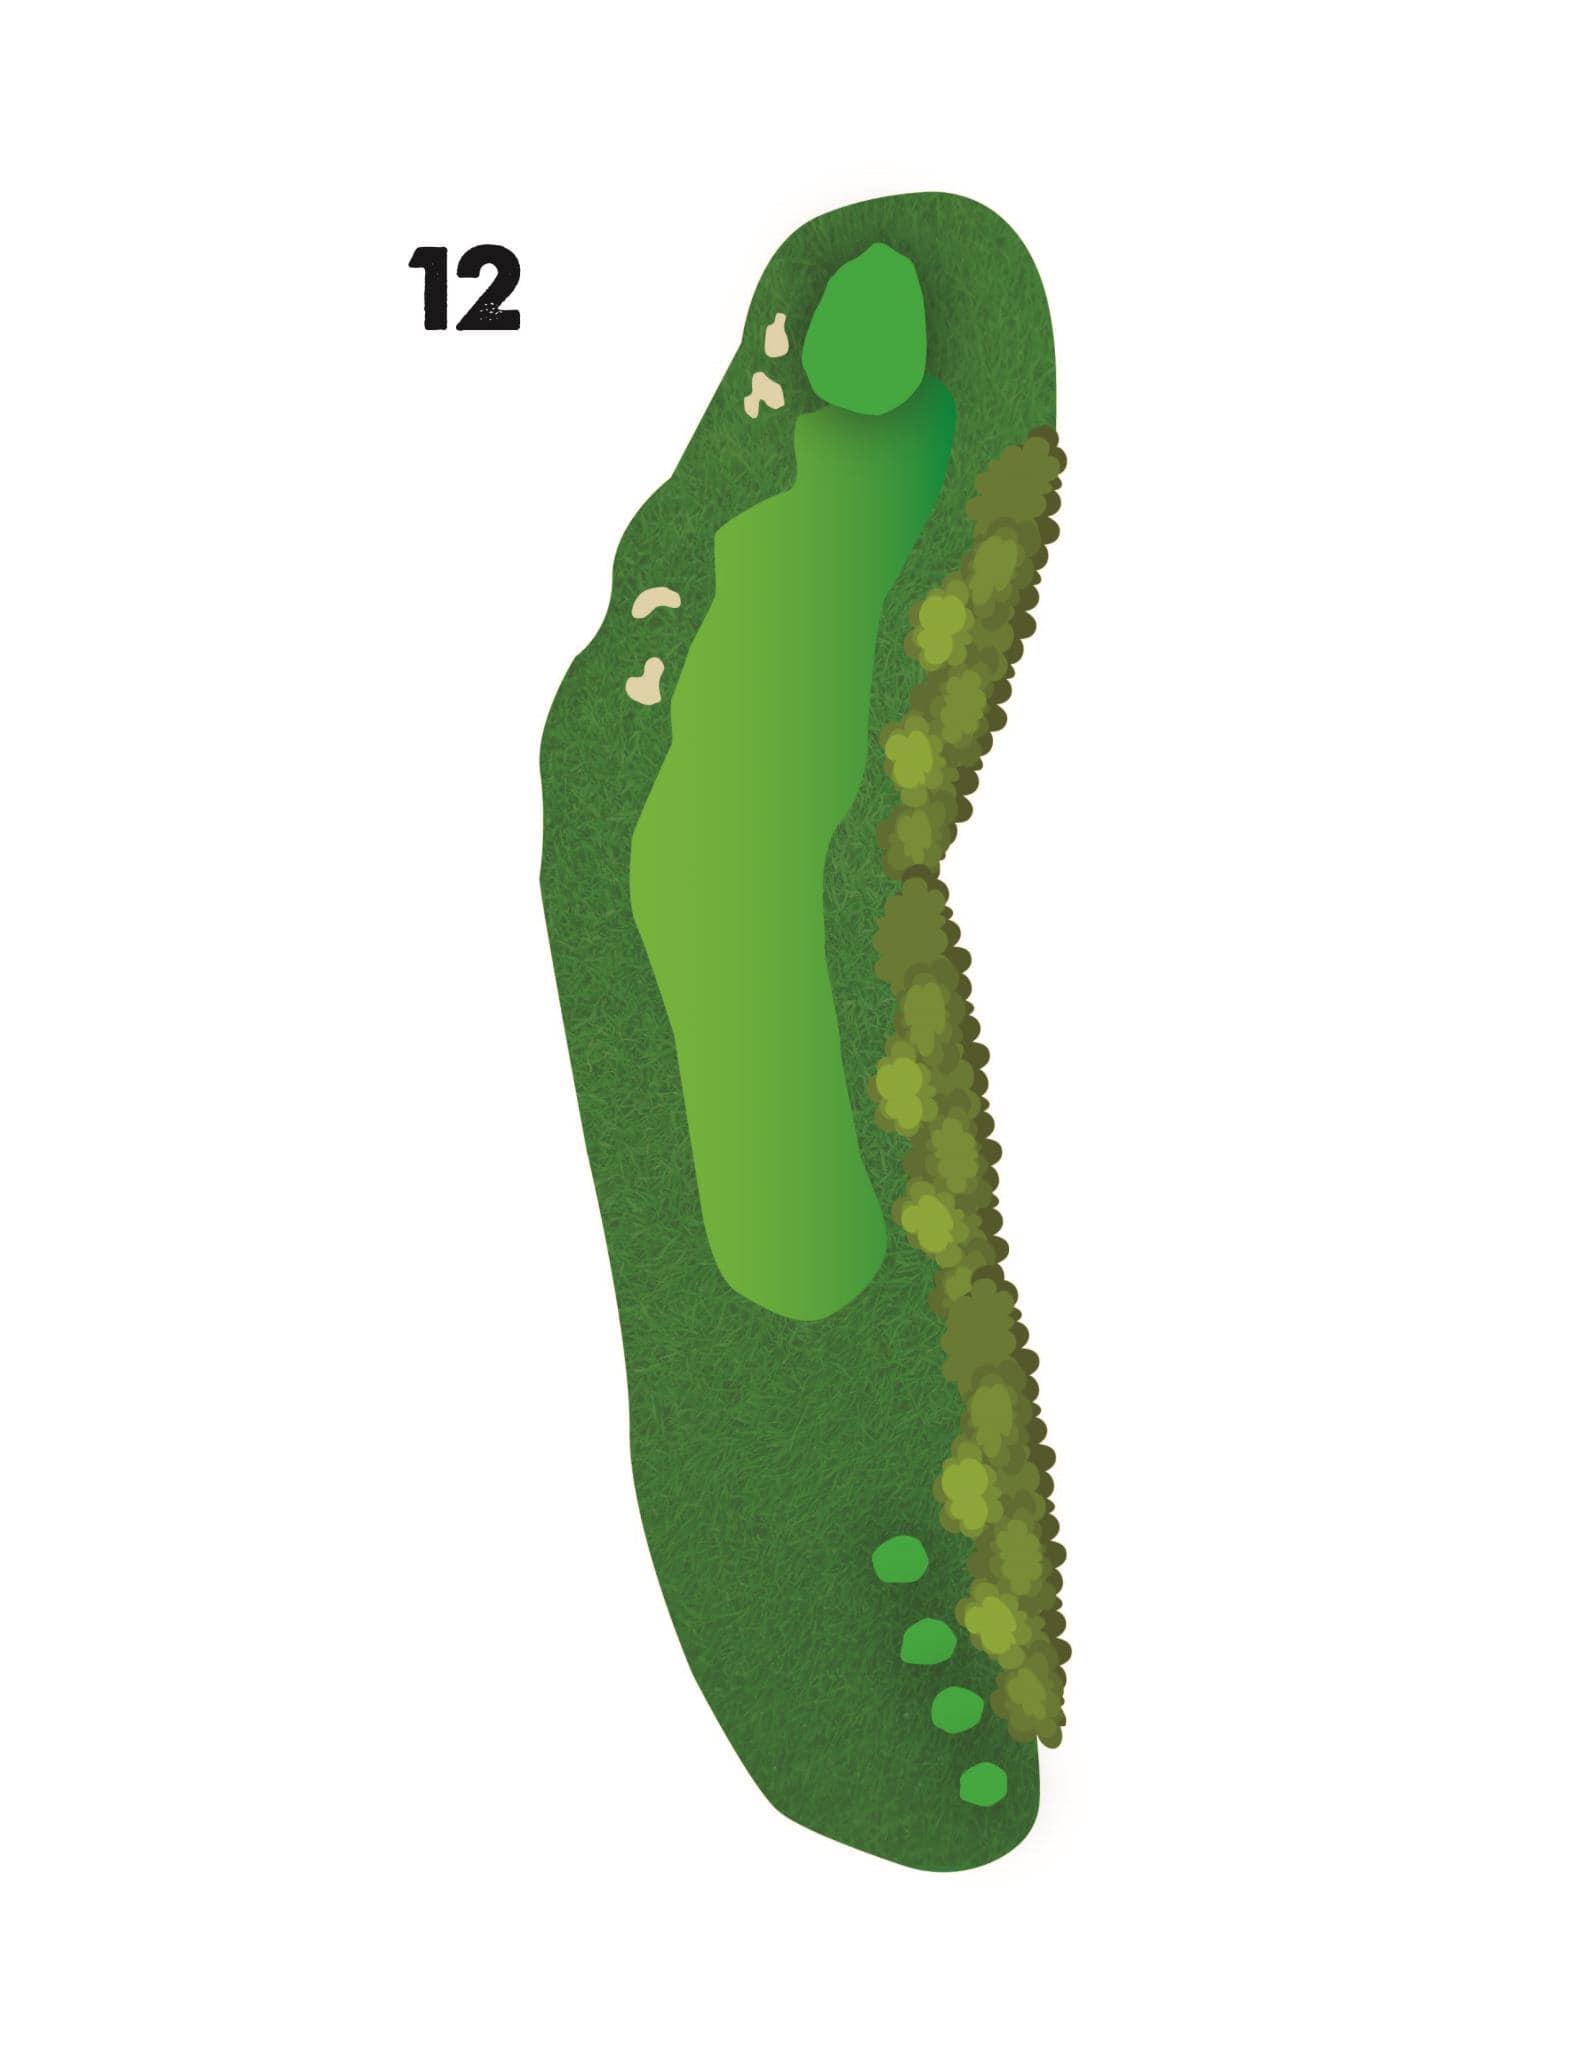
Hole #12
- Par 4
- Men's Handicap: 10
- Women's Handicap: 8
- 405
- 370
- 343
- 305
Hole Description
The 12th hole is a slight dogleg right par 4. You can hug the right side and cut off some distance if you like, but not necessary as there is plenty of room on the left side of this fairway. Tall pines on the right side have a way of catching and deflecting golf balls.
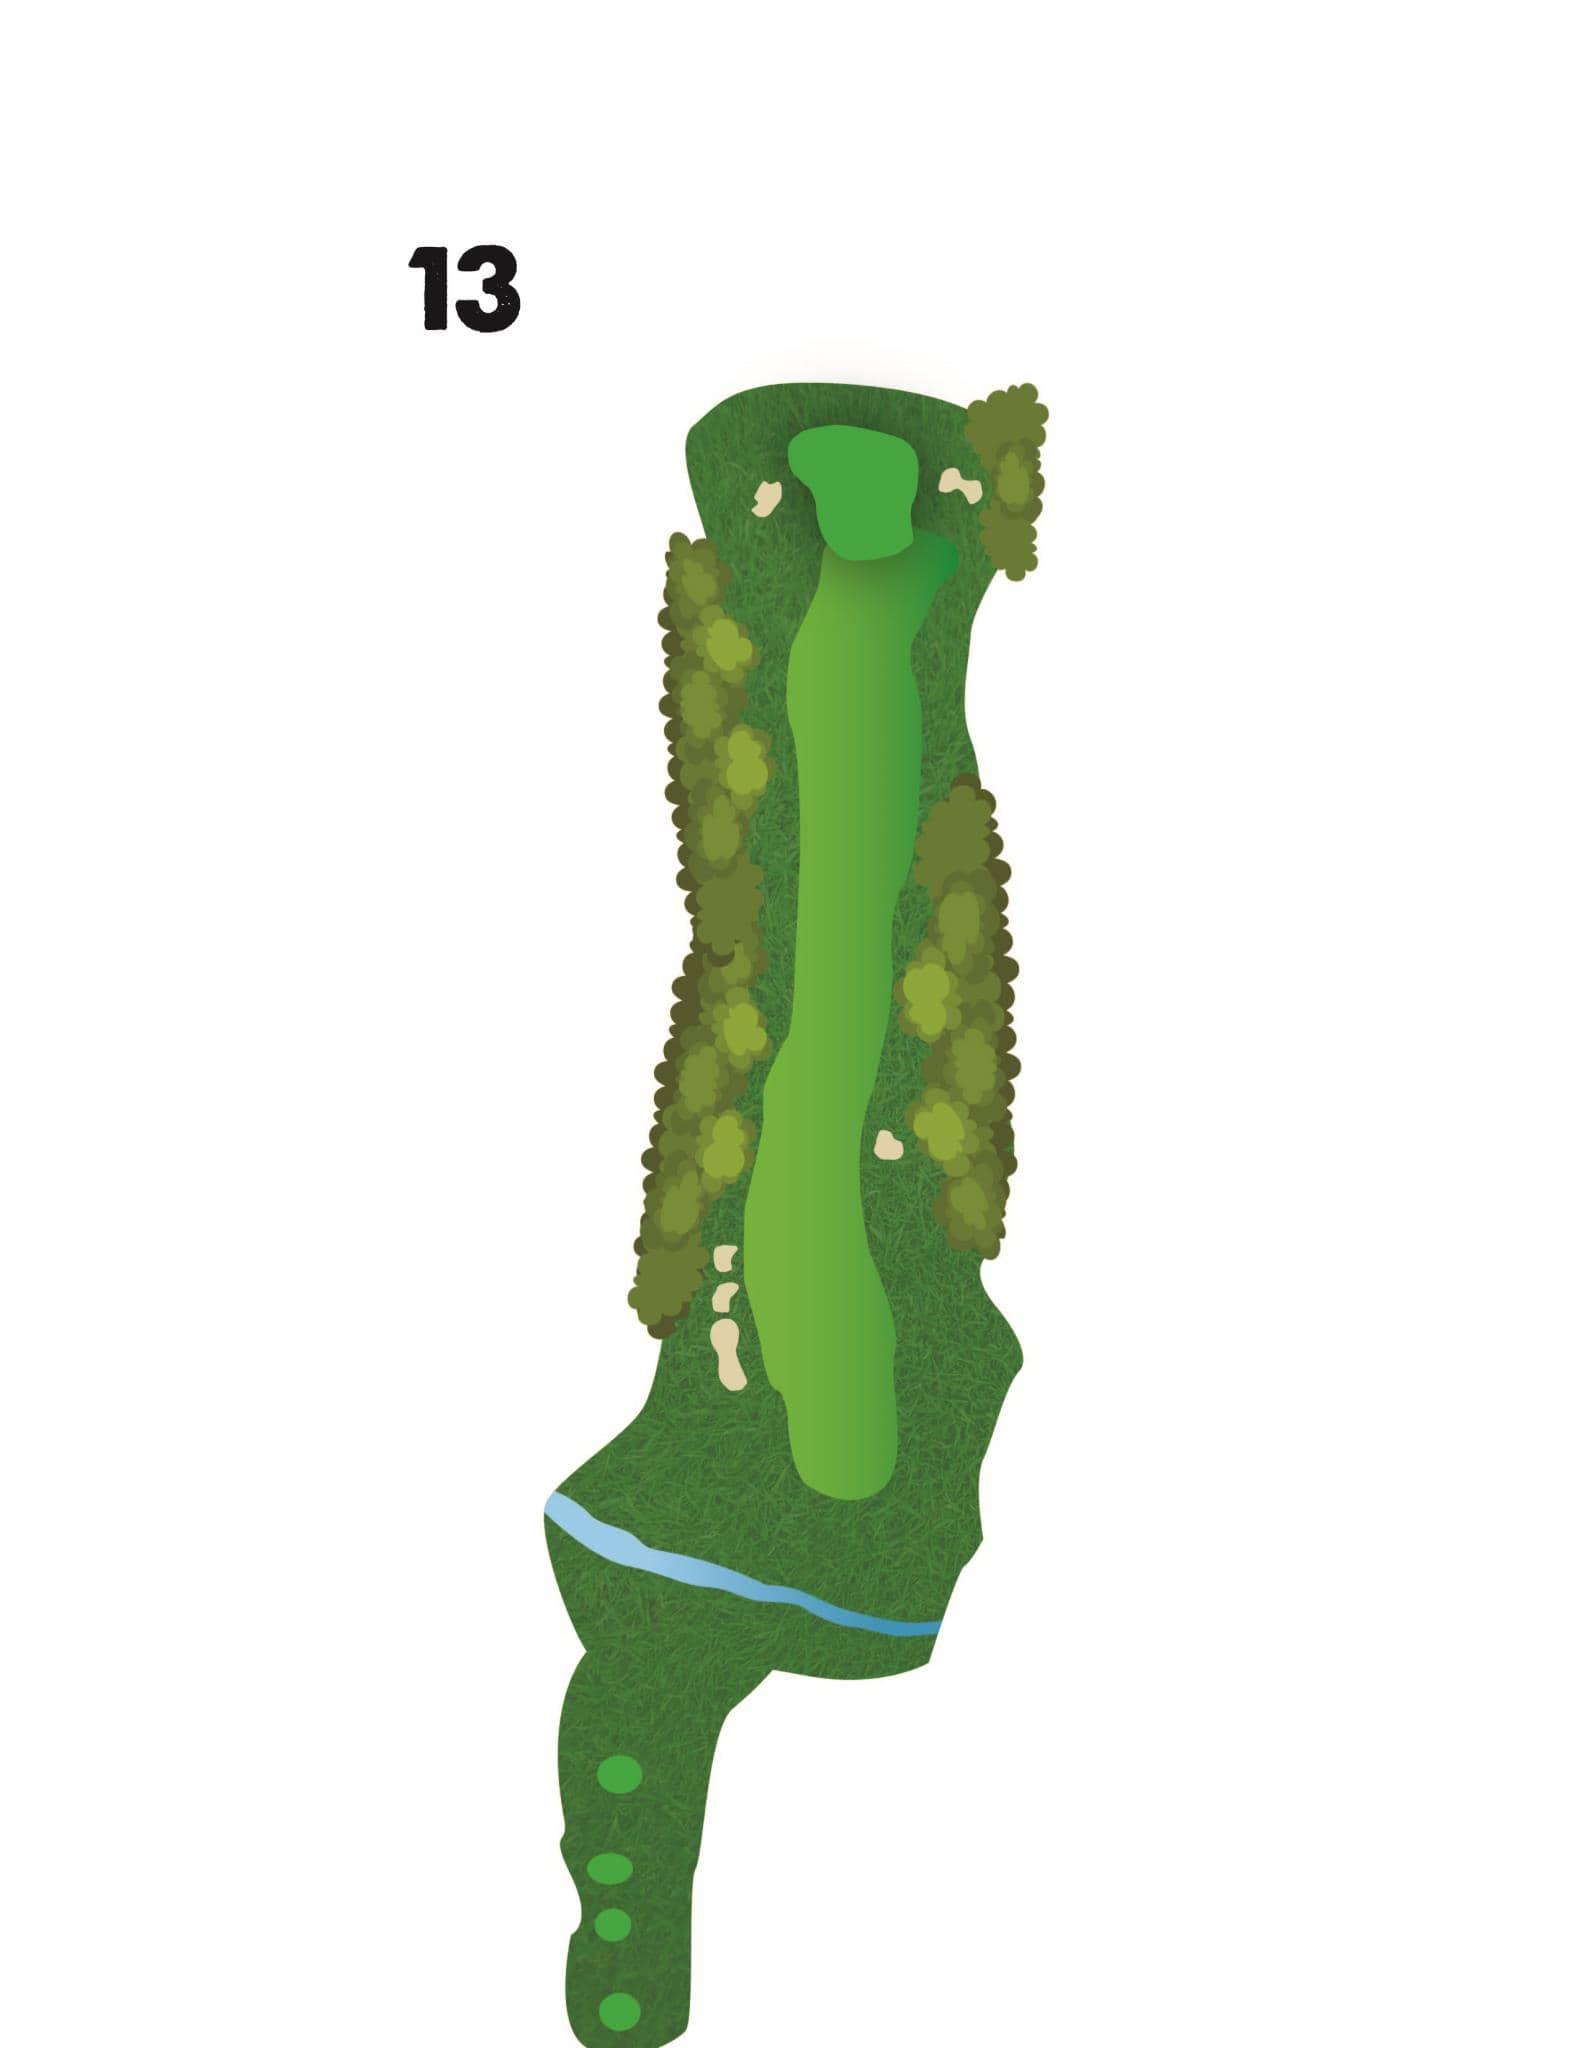
Hole #13
- Par 5
- Men's Handicap: 6
- Women's Handicap: 6
- 528
- 485
- 435
- 384
Hole Description
The 13th hole is a straightaway par 5 and is the shortest and most reachable of the par 5’s here at the Creek. The landing area for tee shots slopes right to left so it is advisable to aim for the right side of the fairway to avoid a hazard that runs the length of the left side of this hole. If you can manage to find the right side of the fairway on your tee shot and avoid a pot bunker strategically located to catch misplaced tee shots, you will have a mid to long iron into this green and be putting for eagle.
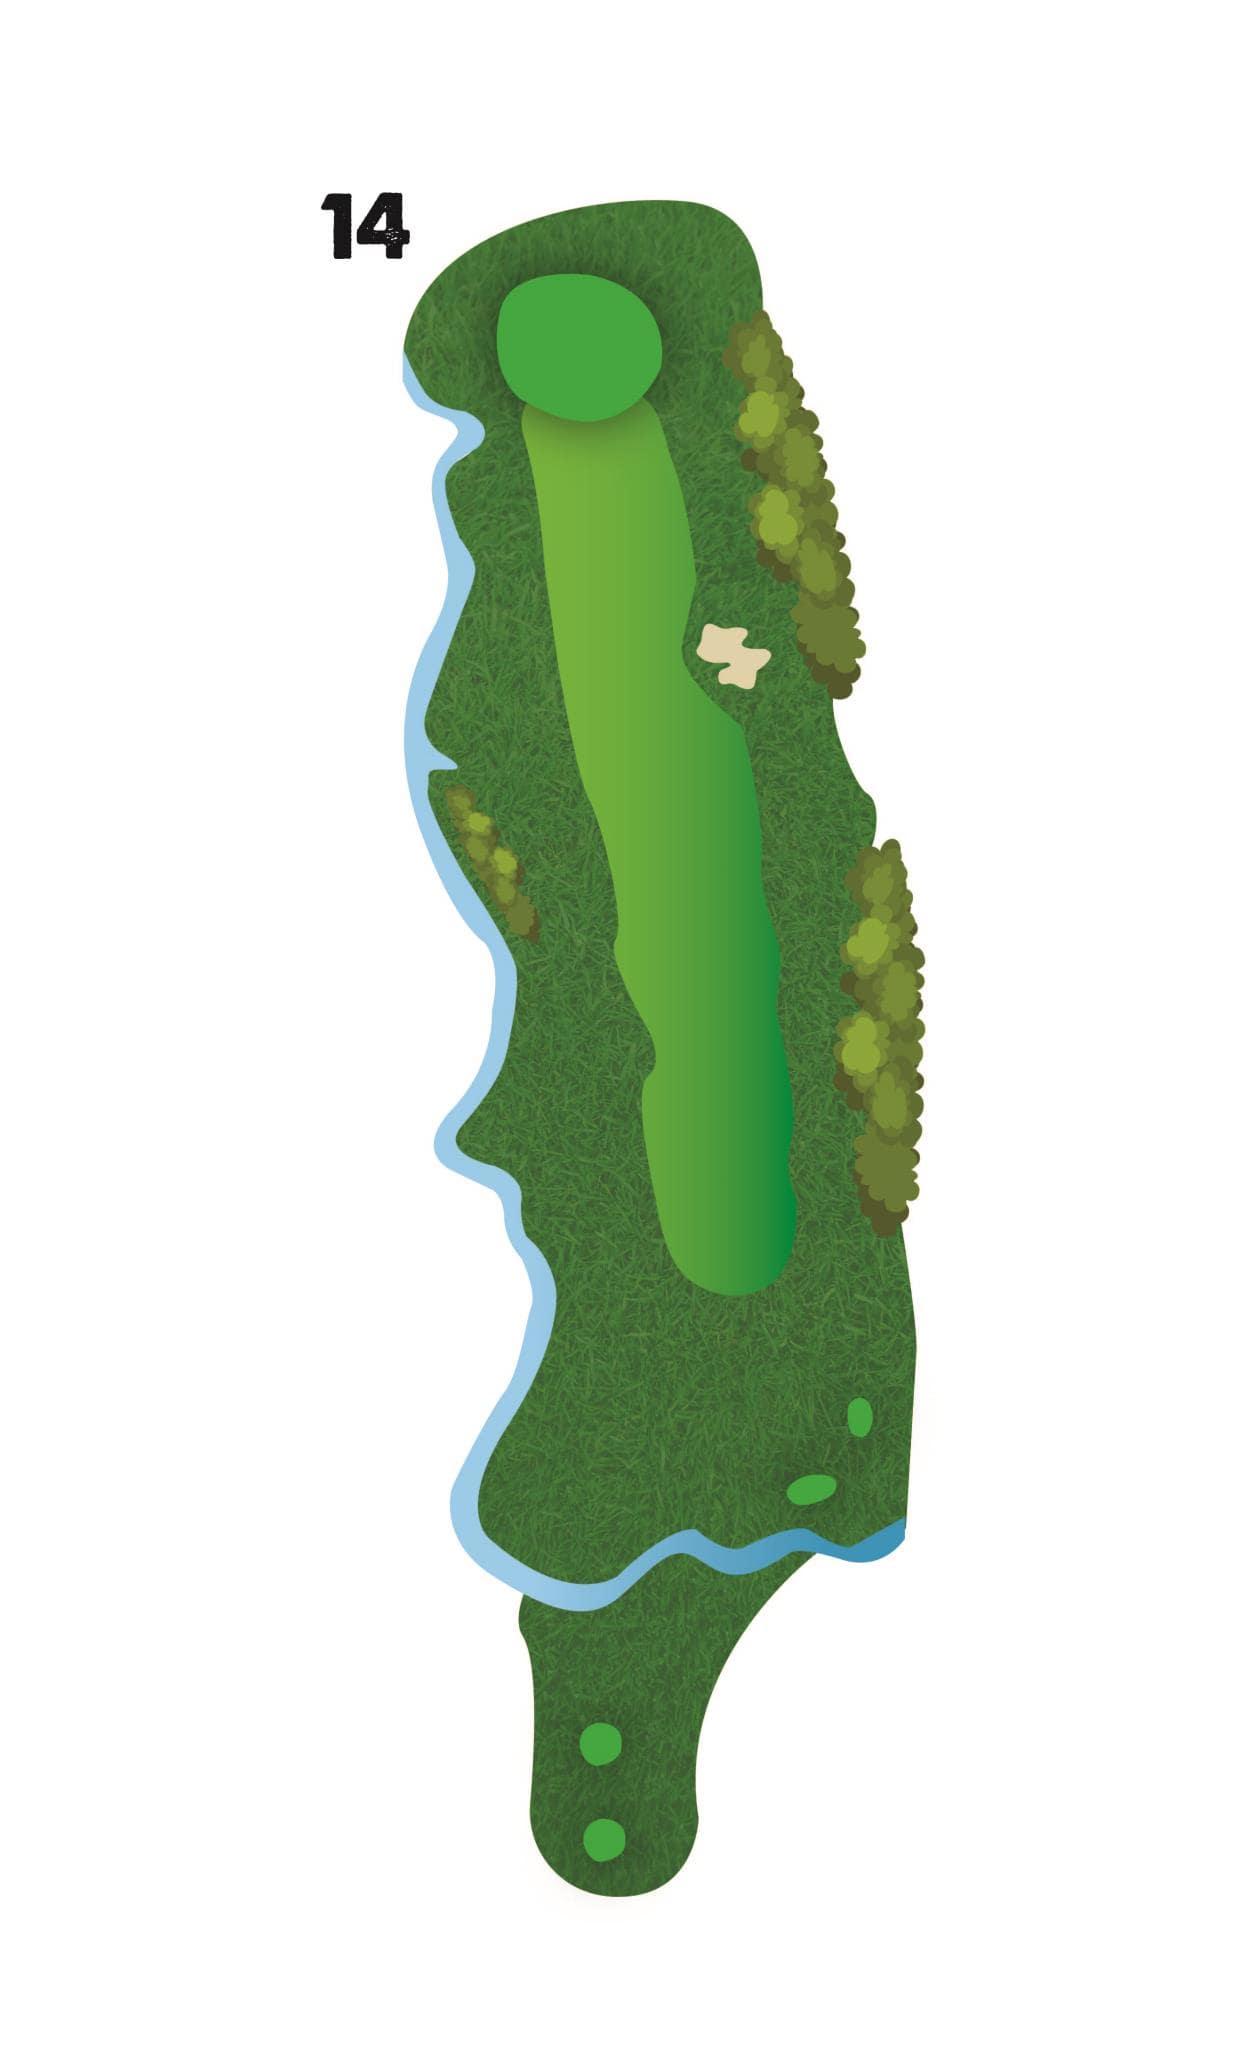
Hole #14
- Par 4
- Men's Handicap: 2/12
- Women's Handicap: 10
- 445
- 424
- 315
- 293
Hole Description
With tall Georgia pines in play off the left side of this tee box, the drive almost forces a draw off the tee. A well struck tee ball is a must, or you will find yourself with a lengthy approach shot. Par is a good score here.
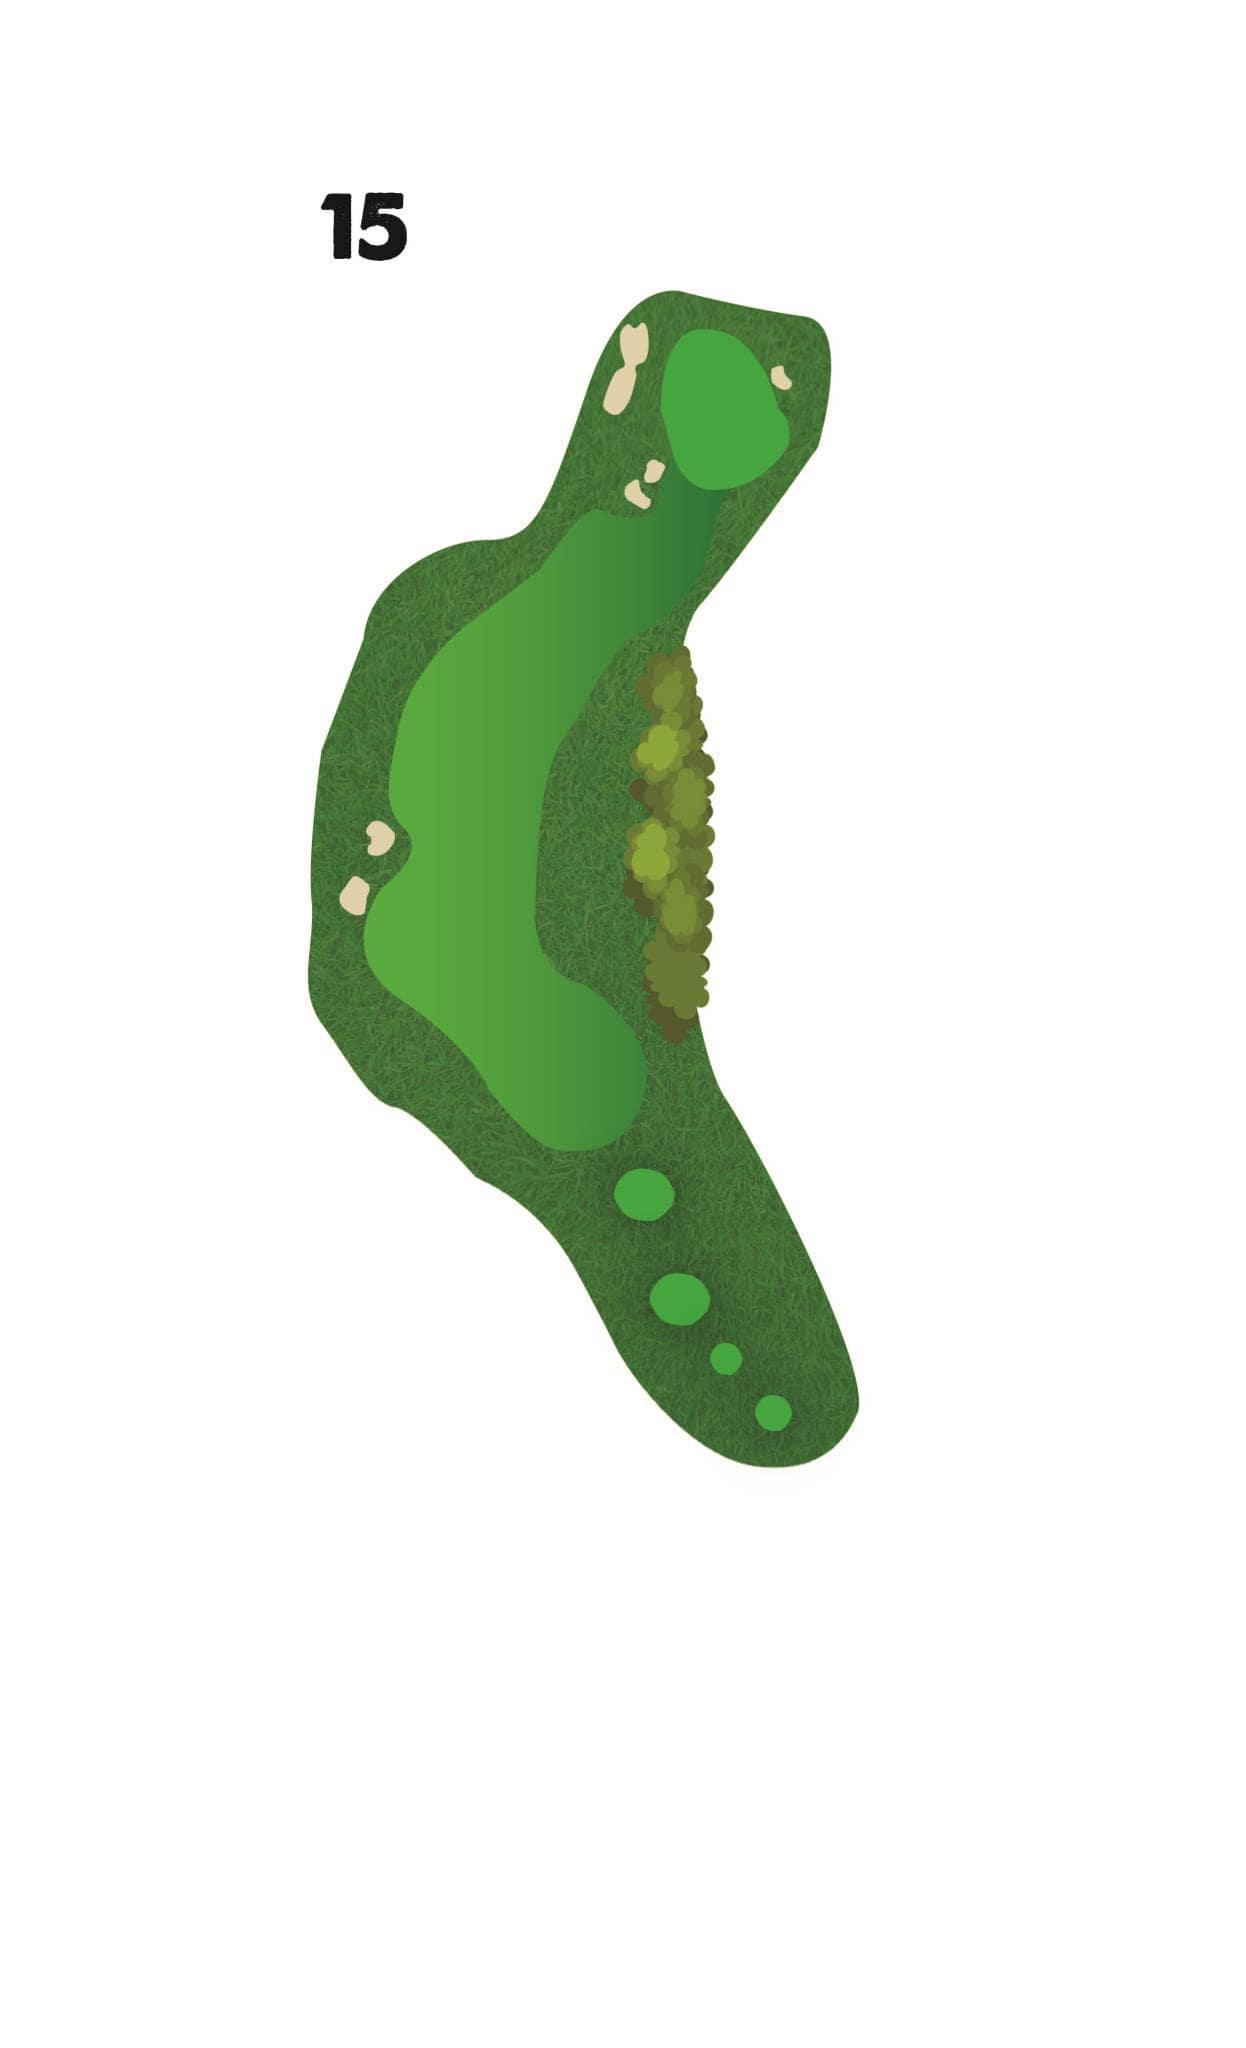
Hole #15
- Par 4
- Men's Handicap: 12/2
- Women's Handicap: 12
- 398
- 359
- 333
- 277
Hole Description
The 15th hole is a true 90-degree dogleg to the right. If the previous hole encourages a draw, this one leans more to a cut shot. After a well-placed tee ball, the 15th really gets tough with an uphill and blind approach to the green. Best of luck here as level lies are hard to find.
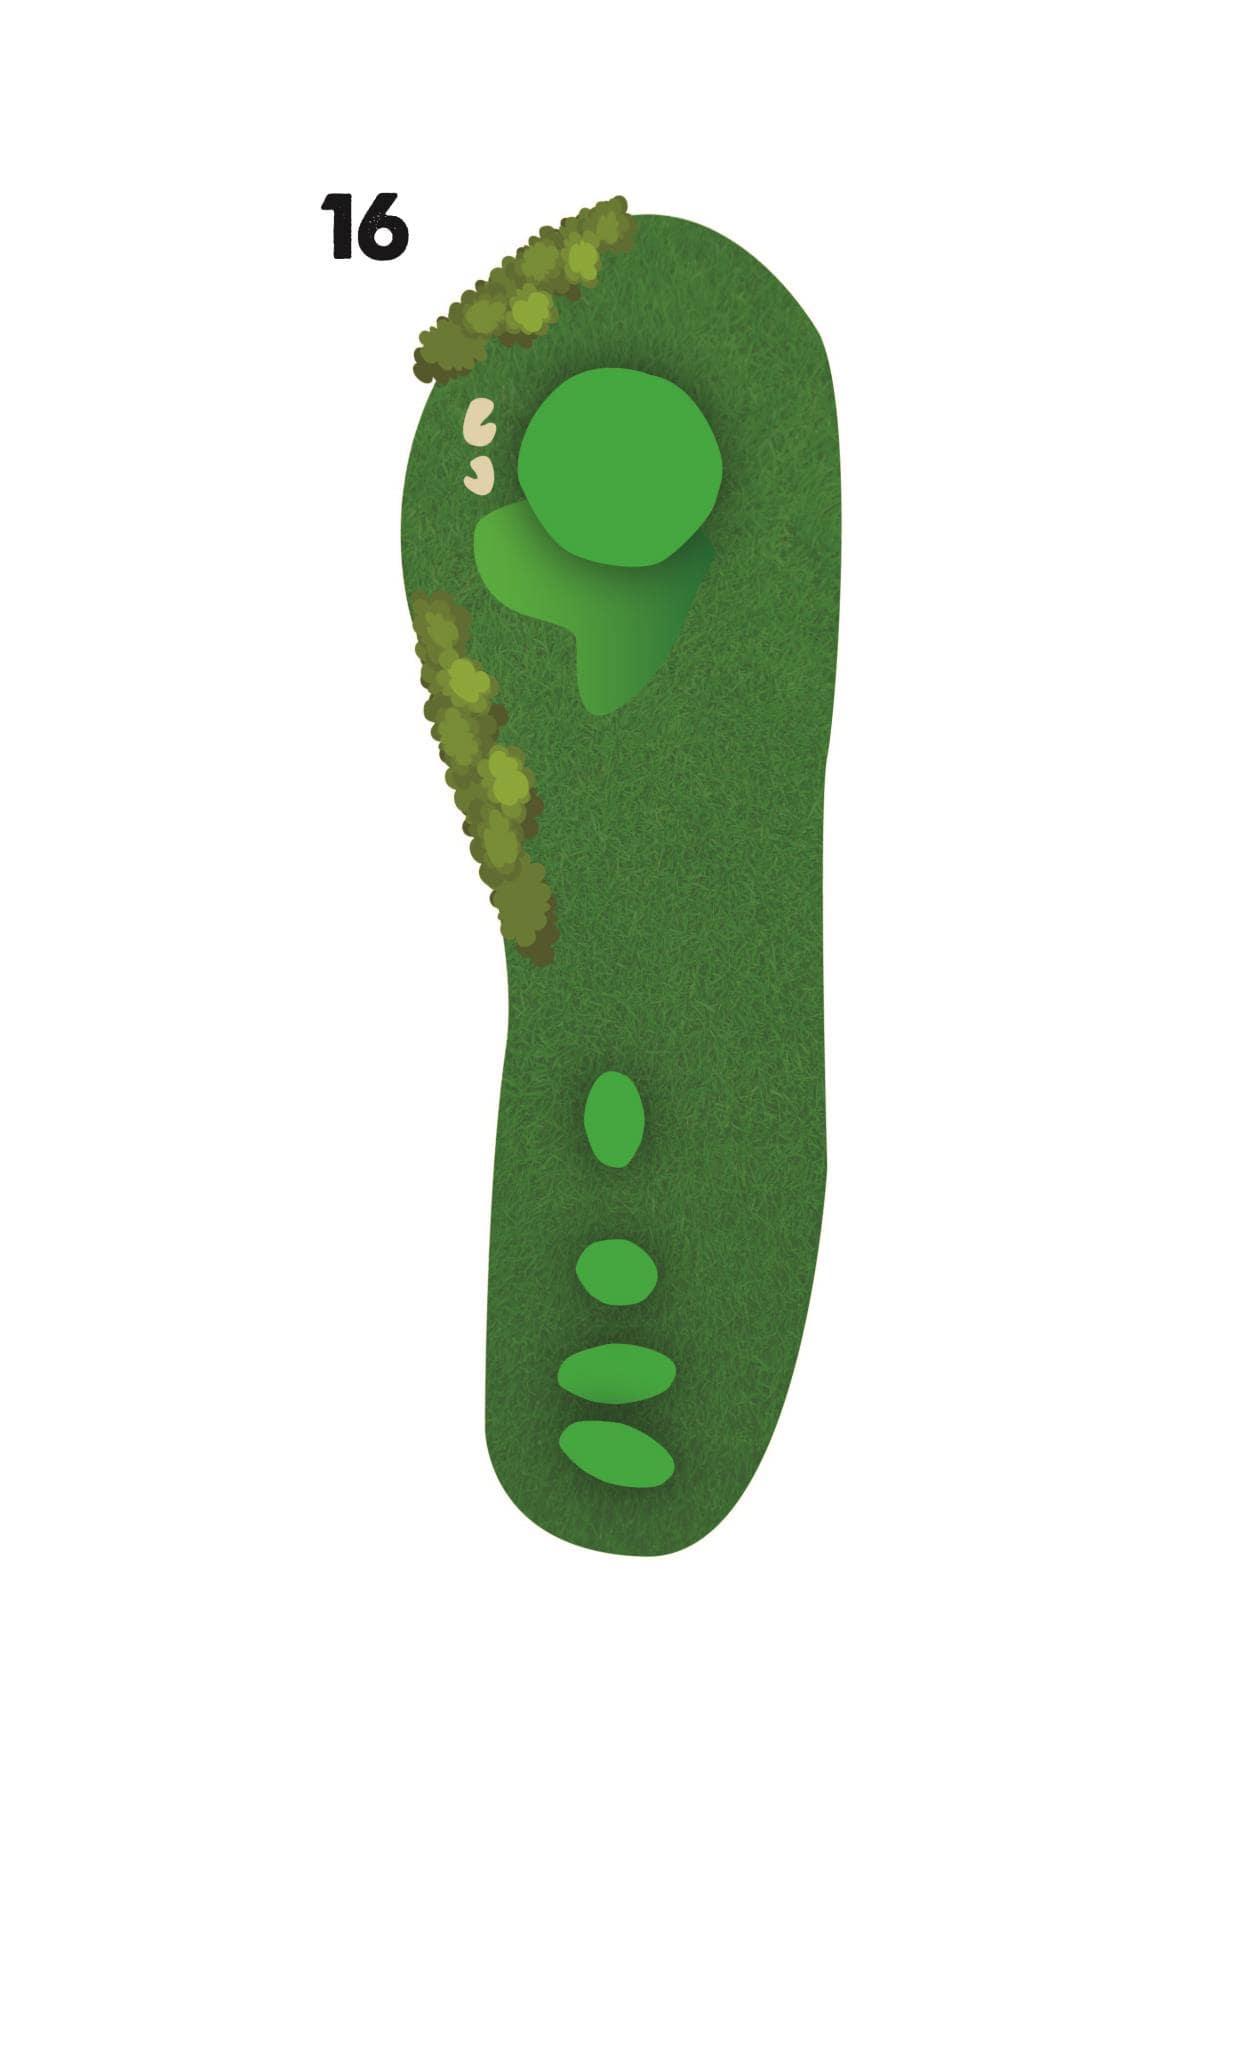
Hole #16
- Par 3
- Men's Handicap: 16
- Women's Handicap: 16
- 218
- 201
- 180
- 148
Hole Description
The 16th hole is a long, straightaway par 3. By far the most difficult on the course due to its length which plays well over 200 yards the back tees. You can bail out short and right of this green, but long and left and your looking at a big number here.
Hole #17
- Par 4
- Men's Handicap: 4
- Women's Handicap: 2
- 378
- 337
- 298
- 247
Hole Description
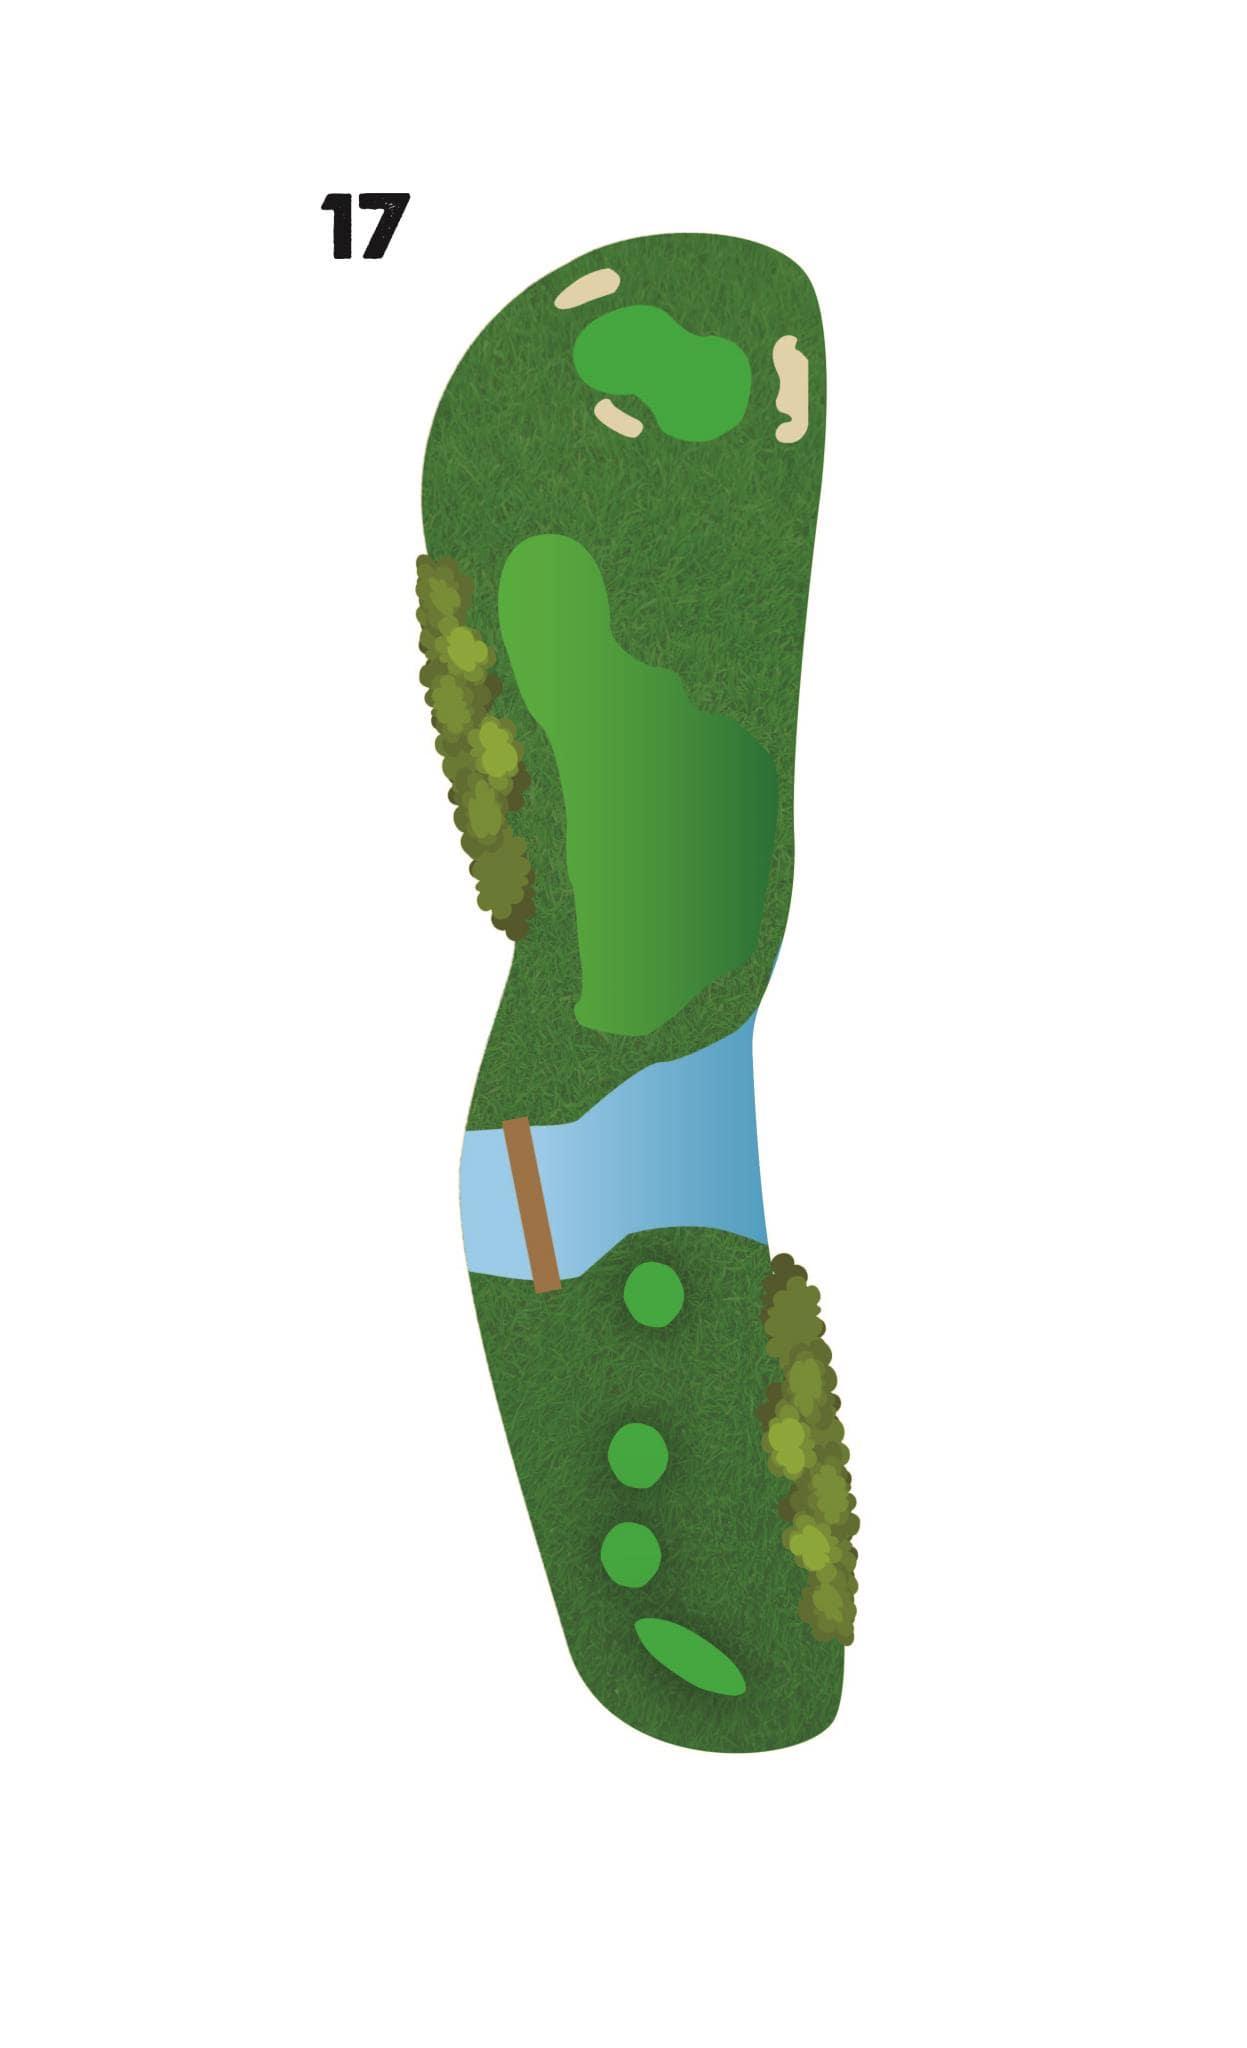
The signature hole here at the Crooked Creek Club. The tee shot requires precision as anything hit a little right will find the large lake that will most certainly have your attention. Once you find the fairway, you’re only halfway home as the 17th hole has our signature island green. There’s ample room surrounding the green but getting your distance dialed in can be a challenge as the wind always seems to be swirling here.
Hole #18
- Par 5
- Men's Handicap: 14
- Women's Handicap: 4
- 502
- 462
- 419
- 378
Hole Description
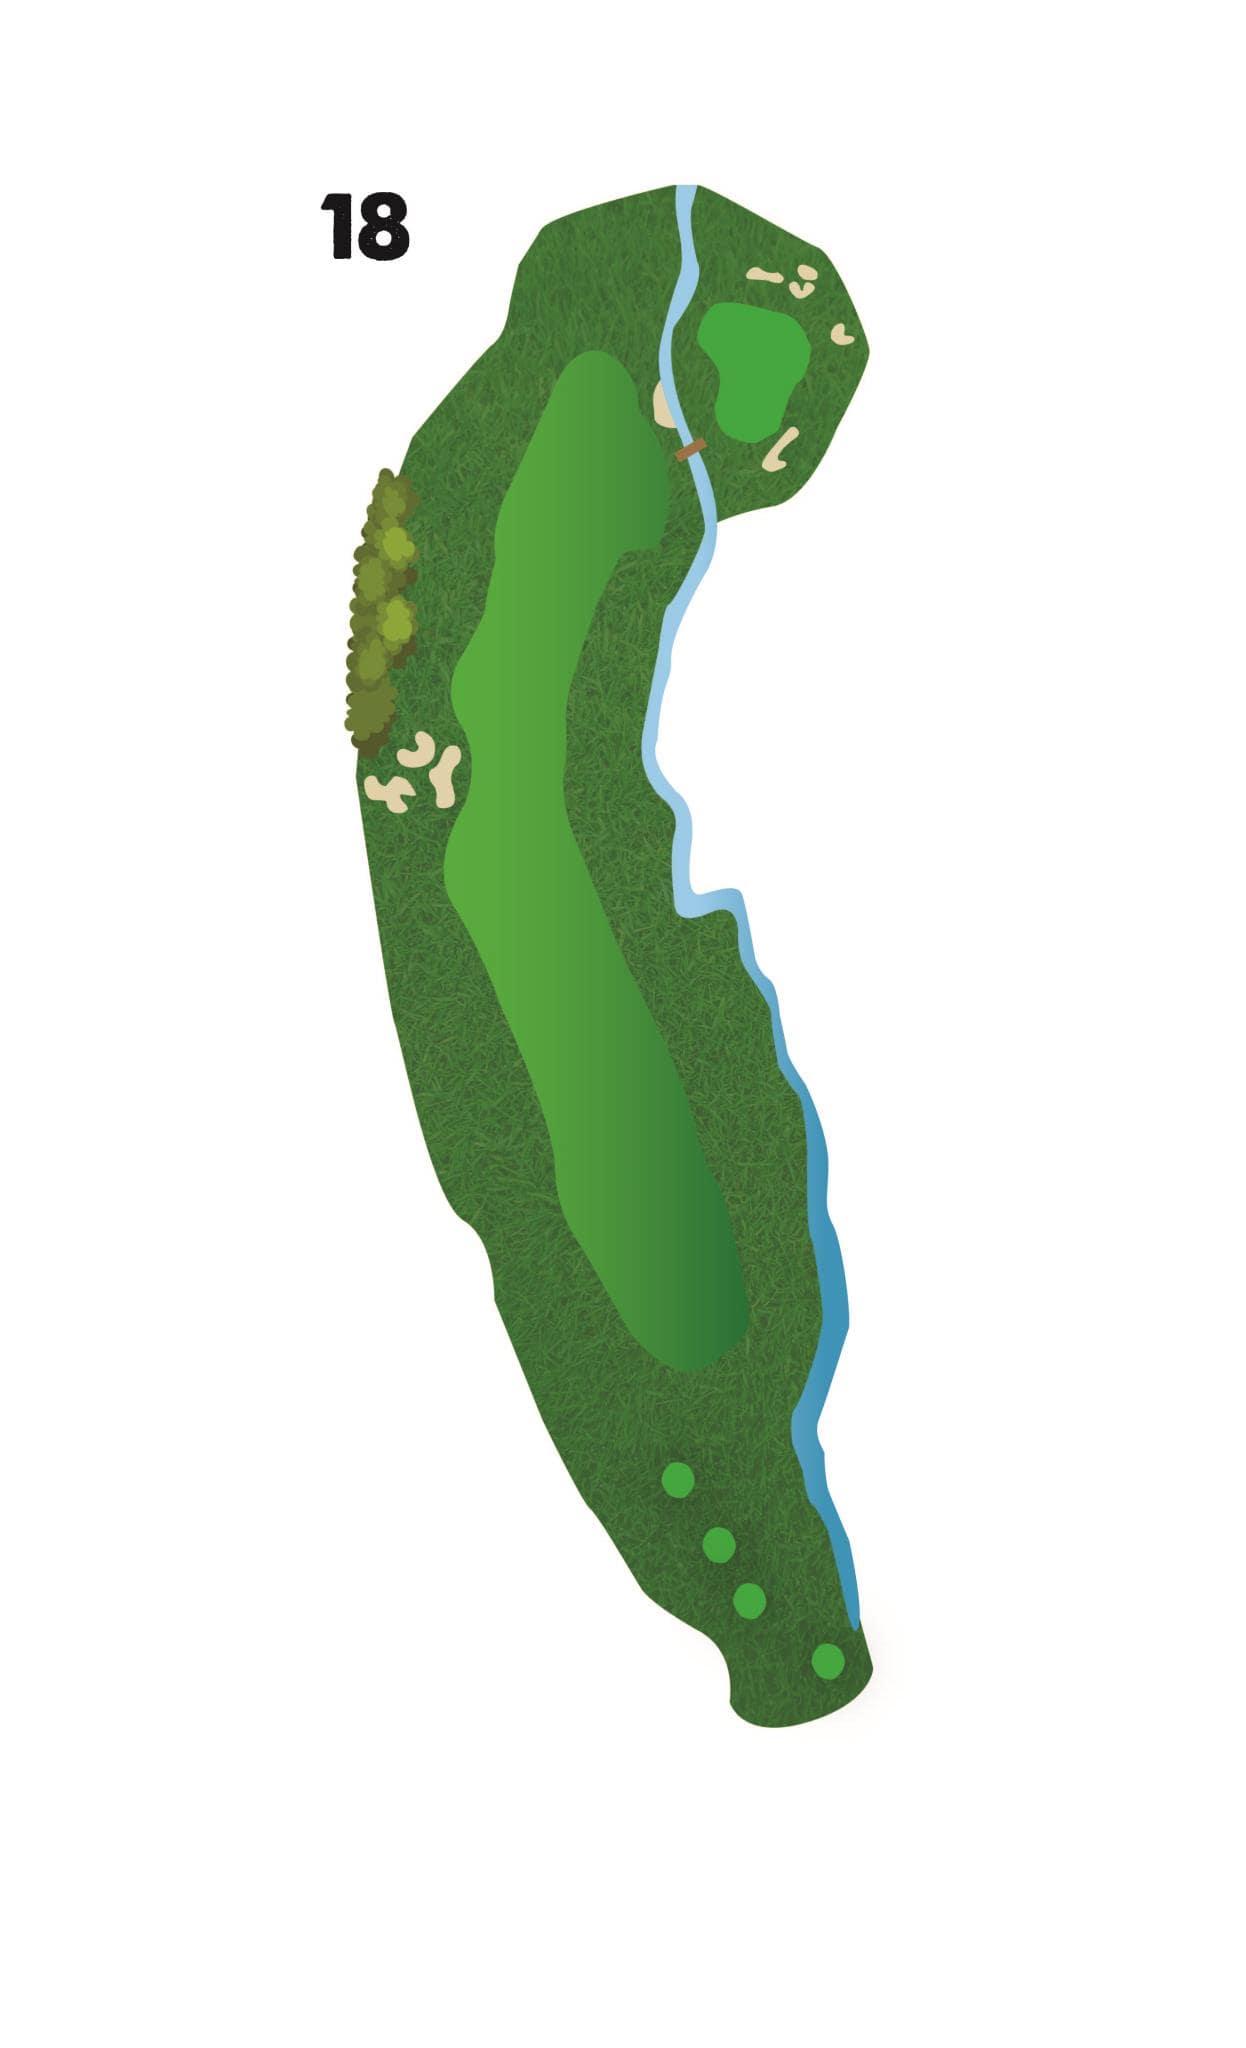
The 18th hole is a true risk/reward par 5. A well hit tee ball can leave you between 200-225 yards away form the hole. Then you are treated with a blind second shot up to the green. A crooked creek runs in front of the green, hence the risky part. Any score from a three to a snowman is in play here.


